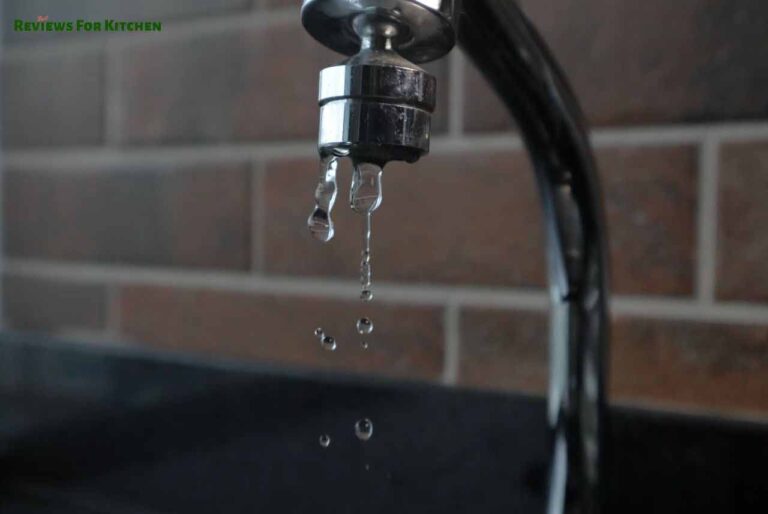
Water pressure is the force or speed of water flowing through a pipe. The more water flows through a pipe, the higher the pressure. If you want to solve the lower water pressure issue, you need to determine your problem’s root cause.
You don’t have to be skilled to do this, and you can discover the root cause within a few of general investigation. Then the lower water pressure in the kitchen faucets will be easier to repair. But first, you need to find out the size and location of the problem.
So, how to repair low pressure in a kitchen faucet? Let’s dig in deep to know the solutions in detail.
How to Repair Low Pressure in A Kitchen Faucet?
First- Find out the Problem
Before solving the problem of low pressure in the water tap, it is necessary to determine the root cause of the problem.
You cannot solve the problem without knowing where the real problem is. Maybe this problem is just happening to you, or it can happen to everyone in a building.
If this problem occurs with your neighbors, then it must be understood that there is a water supply problem.
If there is a problem with the water supply, you can install a water booster, enhancing water pressure in the faucet.
And if it just happens to you, you have to understand that the problem is located in your water faucet. The problem that can come off in your faucet_
- Clogged Aerator.
- Clogged Filter/Cartridge
- Damaged or clogged pipes.
- Ineffective pressure enhancing valve.
- Water Heater problem
Low water Pressure Fixing
If any one of the above is affected by any trouble and does not work properly, the water pressure will decrease.
So, you need to find the root of the problem. If there is an issue with any of these, let’s see how it can be fixed:
Repair the Aerator
Attached to the end of the call line is a small device called an aerator screen. This screen increases water pressure while reducing water consumption.
If the curtain gets stuck for some reason, it can reduce the limit of water flowing through the kitchen faucet. Here’s how to clear an aerator screen:
Step 01
Using your hand, unscrew the aerator from the top of the water tap. It will usually open when it rotates counterclockwise. If you have too much trouble unscrew it by hand, you can open it with pliers’ help.
Step 02
Then, take a mixture of vinegar and water in a pot; in this case, 50% vinegar solution should be used.
Then soak the aerator for 30 minutes to 1 hour. Then rub the screen of the aerator with something like a brush and wash it off with clean water.
Step 03
Then reconnect Aerator to Faust if you think the screen is clean enough. If all goes well, the water pressure will increase compared to before
Related Article: How to Remove Aerator from Moen Kitchen Faucet? Unearth the Best Tricks!
How to Clean the Cartridge?
If the water flow does not increase even after cleaning the aerator screen, you should check the cartridge.
Water pressure can be reduced due to the cartridge getting stuck in the dirt. So, you have to clean it. The process of doing this is presented below:
Step 01
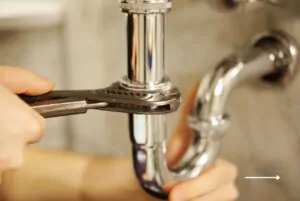
Close both cold and hot water supply valves. Unscrew the faucet from its base and remove the handle. Below, you will find the cartridge.
Step 02
Disconnect from the cartridge body by pulling straight up. If you can’t do it by hand, you can use pliers or wrenches.
Step 03
Rinse the cartridge under running water. If the alkaline substance accumulates and covers it, soak it with the vinegar mixture for 30 minutes to an hour. If it is worn out or slightly worn out, we suggest you replace it.
Step 04
Once the cartridge is clean, reconnect it after purchasing a new one. Slowly tighten the cartridge nut; Avoid overdoing it. Open the supply valves again and check the pressure. It should return to normal.
How to repair Pipe/Line?
If the water faucet flow does not increase even after performing the above two procedures, then the water lines or pipes should be monitored.
Having damaged or blockage in the line or pipe can reduce the water pressure. Removing the pipe’s blockage is not a very difficult task, and you can do it very easily.
Step 01
First, turn off the water supply valves. Then open the tap to remove the water stuck in the tab.
Step 02
Now disconnect the supply lines from the faucet using a wrench or pliers. After disconnecting the supply line from the two faucets, turn on both the supply valves completely and allow water to flow for some time. If there is any obstruction in the pipe, it will be removed.
If there is a serious obstruction in the line and it is impossible to remove it, it is advisable to install new pipes. Or, in this case, you can take the help of a plumber.
Step 03
After removing the pipeline barrier or reconnecting it to the supply line faucet after purchasing a new pipe. Do not tighten them too much when connecting. After connecting, open the tab and check the water pressure.
Ineffective Pressure Enhancing Valve
Some homes are equipped with something called a “pressure reduction valve.” This device controls the pressure coming into your home from the municipal water supply.
It is relatively easy to detect; Sit on the incoming water line and look for a bell-shaped device. If the water pressure is low, you can increase the water pressure by loosening the screw.
Turn it counterclockwise and tap again to check for improvements. The replacement may be required if the valve is broken or damaged.
Faqs
Could a clogged aerator really cause that much pressure drop?
Absolutely — and people underestimate this one all the time. The aerator is a tiny mesh screen at the tip of your spout, and even partial clogging from mineral buildup or sediment can cut water flow dramatically. In hard water areas especially, calcium and limescale pack into that mesh over months until the flow is barely a trickle. The good news is it’s the easiest fix of all — no tools, two minutes, and a vinegar soak handles it almost every time.
Low pressure only on the hot side — what does that mean?
That’s almost always a water heater issue. When low pressure is isolated to just the hot tap, the water heater is the first place to look — specifically sediment buildup inside the tank, a partially closed shutoff valve on the heater itself, or a failing dip tube. Check that the heater’s supply valve is fully open first. If it is, the tank likely needs flushing to clear accumulated sediment from the bottom. If the heater is old and the problem is persistent, a plumber’s assessment is worthwhile before it turns into a bigger issue.
My neighbors have good water pressure but mine is low — what's going on?
If the problem is only at your address and not affecting anyone nearby, the issue is inside your home — not the municipal supply. That narrows it down to your faucet’s aerator, cartridge, supply lines, pipes, or the pressure reducing valve (PRV) in your home. Work through each one systematically. A clogged aerator or partially closed valve solves it most of the time. If you check all of those and still can’t find it, that’s when a plumber comes in — there may be a hidden pipe obstruction or a failing PRV that needs professional hands.
What is a pressure reducing valve and could it be causing my low pressure?
A pressure reducing valve — or PRV — is a bell-shaped device fitted to your incoming water line, usually near where the main line enters your home. Its job is to regulate the pressure coming in from the municipal supply so your pipes and fixtures aren’t overwhelmed. Over time these valves wear out or get stuck in a partially closed position, throttling your pressure without any obvious sign. You can try loosening the adjustment screw counterclockwise slightly to increase the pressure — but if the valve is damaged or corroded, it needs replacing rather than adjusting.
How do I clean a faucet cartridge to restore water pressure?
Turn off both the hot and cold supply valves first. Remove the faucet handle, then pull the cartridge straight up out of the faucet body — pliers help if it’s snug. Rinse it under running water to clear loose sediment. If there’s visible mineral buildup on it, soak it in vinegar for 30 minutes to an hour then scrub gently. If the cartridge looks worn, cracked, or damaged, replace it rather than putting it back — a new cartridge for most standard faucets costs under $20 and makes a noticeable difference in flow and pressure.
Can blocked or damaged pipes cause low pressure in just one faucet?
Yes — and this is worth checking if the aerator and cartridge both come up clean. A kinked, corroded, or partially blocked supply line feeding that specific faucet can restrict flow even when everything else in the house is fine. Disconnect the supply lines from the faucet, turn the supply valves on briefly into a bucket, and check if the water flows strong from the lines themselves. If it does, the faucet body is the problem. If the flow from the lines is weak, the pipes feeding that fixture need attention — either clearing or replacing.
What's a water pressure booster and do I actually need one?
A water booster is a pump-based device installed on your main supply line that mechanically increases pressure throughout your home. You’d only really need one if the low pressure is coming from the municipal supply itself — meaning your neighbors are dealing with the same weak pressure and it’s a known area-wide issue. For most single-faucet or single-fixture pressure problems, a booster is overkill and unnecessary. Fix the aerator, cartridge, and valves first. A booster is a last resort for a whole-home supply problem, not a DIY fix for one slow faucet.
When should I stop DIYing and call a plumber for low water pressure?
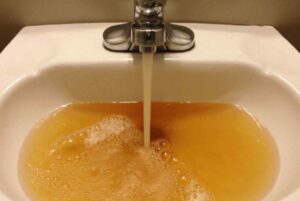
Call a plumber when you’ve worked through the aerator, cartridge, supply lines, and PRV adjustments and the pressure is still weak — or when the low pressure is affecting multiple fixtures across the house at the same time. Also get professional help if you suspect the issue is inside the walls — corroded or blocked pipes hidden in the structure need proper diagnosis and tools to address safely. And if the pressure problem comes with discolored water, a bad smell, or signs of leaking, don’t delay. That combination suggests something more serious than a simple clog.
Final Verdict About Repair Low Pressure in a Kitchen Faucet
If there is no solution to the Low Pressure’s problem in A Kitchen Faucet, you have a problem with the water heater.
However, it is difficult to solve the heater’s issue, so we do not recommend trying it without skills. In this case, you are advised to solve the problem with the help of a plumber.