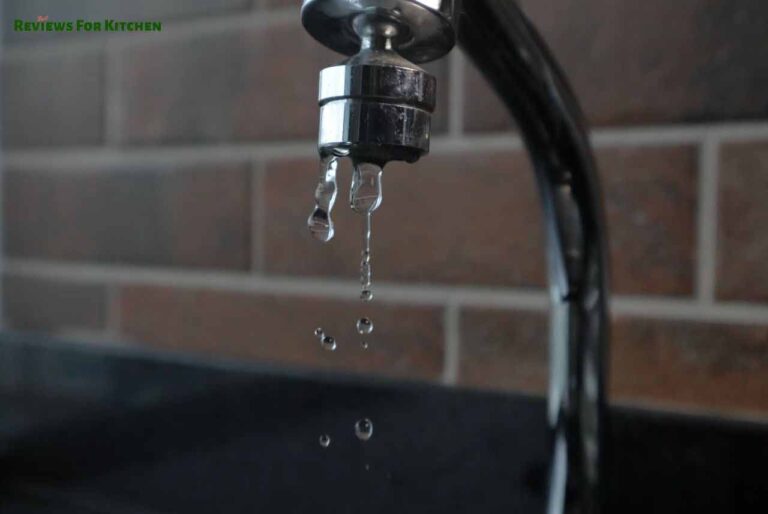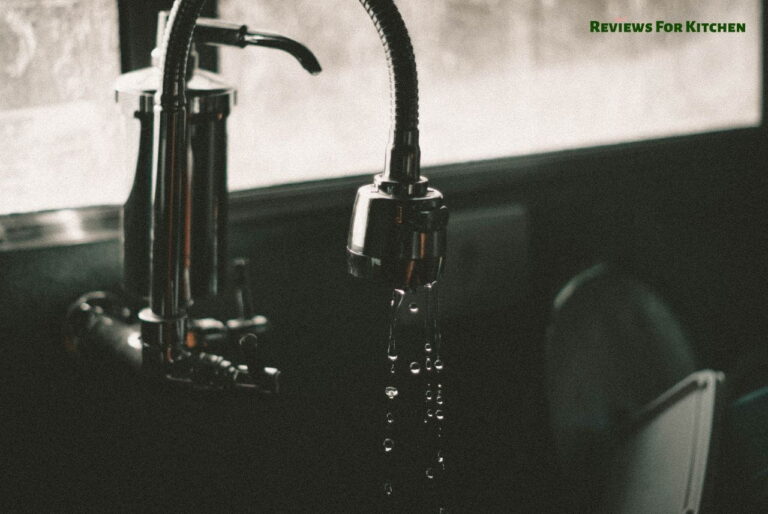
There’s a specific kind of frustration that comes from turning off your kitchen faucet, walking away, and then hearing that slow, steady drip behind you. You turn it off tighter. The drip continues. You turn it off even tighter. Still dripping.
A kitchen faucet dripping after the water is turned off is one of the most common plumbing complaints in the house — and also one of the most fixable without calling a plumber. In almost every case, the drip is coming from a worn internal part that no longer creates a watertight seal. Depending on your faucet type, that part is either a cartridge, a ceramic disc, an O-ring, or a rubber washer. Replacing it is usually a one-hour job with basic tools and a $5 to $15 part from any hardware store.
That said, the fix varies depending on what type of faucet you have. Some drips come from a different place than expected, and diagnosing it correctly before you start taking things apart saves a lot of time. This guide covers every common cause, how to figure out which one applies to your faucet, and the step-by-step fix for each. If the drip is coming from the base of the faucet rather than the spout, the issue may be different — our guide on how to fix a leaking kitchen faucet covers that scenario in full.
⚡ Quick Takeaways
- A drip from the spout after shutoff almost always means a worn internal sealing part
- Single-handle faucets usually have a worn cartridge or ceramic disc
- Double-handle compression faucets usually have a worn rubber washer or O-ring
- Most repairs take 30–60 minutes and cost under $15 in parts
- A damaged valve seat needs either resurfacing or full faucet replacement
- A slow drip wastes over 3,000 gallons of water per year — worth fixing promptly
Why Is My Kitchen Faucet Still Dripping After I Turn It Off?
The short answer: something inside the faucet that’s supposed to block water flow has worn out enough that water pressure can push past it. Every time you turn the faucet on, the internal parts cycle through opening and closing. Over thousands of uses, the parts that create the seal between the water supply and the spout gradually degrade — rubber gets hard, plastic wears down, small metal surfaces corrode.
The real culprit is always internal pressure
Your home’s water supply is under constant pressure — typically between 40 and 80 PSI in most U.S. and Canadian homes. When the faucet is on, the handle opens an internal valve and water flows. When it’s off, that internal valve is supposed to create a complete seal against that pressure. A worn part means the seal isn’t complete anymore, and even a small gap is enough for pressurized water to push through drop by drop.
Tightening the handle harder doesn’t solve this, by the way. It might temporarily compress a worn washer enough to stop the drip for a day or two, but the underlying part is still worn. Overtightening can actually cause additional damage to the valve seat — the fixed surface inside the faucet body that the washer or disc presses against. Once the valve seat is scored, you’re dealing with a harder and more expensive fix.
How to figure out which faucet type you have
Before diagnosing the cause, identifying your faucet type is the most important first step. The internal parts and the repair procedure are completely different depending on the design.
- Single-handle faucets — one handle that arcs left to right for temperature and up and down for volume. Usually a cartridge or ball valve design. The most common type installed in U.S. kitchens over the past 30 years.
- Double-handle faucets — separate hot and cold handles. Usually compression or ceramic disc design. If only one side drips, that handle’s valve is the problem.
- Touch or touchless faucets — electronic sensors control the valve. A drip from one of these is usually a solenoid valve issue and often requires manufacturer-specific parts.
Check the brand name on the faucet body and look up the model number before buying any replacement parts. Cartridges in particular are brand-specific — a Moen cartridge won’t fit a Delta, and using the wrong one means taking everything apart twice.
The Four Most Common Causes of a Dripping Faucet Spout
Nearly every dripping kitchen faucet comes down to one of these four causes. Match the description to what you’re seeing and you’ll know exactly what part to buy before you start the repair.
| Cause 01 | Worn Cartridge | Most common in single-handle faucets. The cartridge controls both temperature and flow — when it fails, the spout drips even when the handle is fully off. |
| Cause 02 | Worn Ceramic Disc | Found in higher-end single-handle faucets. Two ceramic discs press together to create a seal. When one chips or cracks, the seal fails and dripping begins. |
| Cause 03 | Damaged O-Ring | O-rings are small rubber gaskets that seal connections between parts. They harden and crack with age. Usually causes a drip near the handle base or spout collar. |
| Cause 04 | Worn Rubber Washer | The classic compression faucet problem. A rubber washer presses against the valve seat to stop flow. When it wears flat or gets hard, water pushes past it. |
Worn cartridge — single-handle faucets
Cartridges are cylindrical valve assemblies that slide up and down (or rotate) inside the faucet body to control both water volume and temperature. Brands like Moen, Delta, and Kohler all use proprietary cartridge designs, which is why knowing your exact model matters before buying a replacement.
A failing cartridge usually gives early warning signs: the handle gets stiffer to operate, temperature control becomes inconsistent, or the faucet drips for a few seconds after shutoff before stopping — then eventually drips continuously. Replacing a cartridge is genuinely one of the simpler faucet repairs. In most designs, it involves removing the handle, pulling out the old cartridge with pliers, and pressing the new one in. Our guide on how to remove a stuck faucet stem has detailed guidance on getting seized parts out without damaging the faucet body — which is the step that trips most people up on older faucets.
Ceramic disc failure — higher-end single-handle faucets
Ceramic disc valves use two polished ceramic plates that slide against each other to open and close the water flow. They’re extremely durable under normal conditions — manufacturers often rate them for 500,000 cycles or more. That durability comes with one weakness: hard water mineral deposits can scratch or etch the ceramic surfaces over years of use, and a scratched disc can’t create a clean seal.
According to The Kitchn’s guide on dripping faucet repairs, ceramic disc cartridges are often cleanable with white vinegar if mineral deposits are the cause — try soaking the disc assembly before buying a replacement. If cleaning doesn’t stop the drip, the disc is likely physically damaged and needs replacing.
O-ring failure — usually near the spout base
O-rings are small rubber rings that create watertight seals at joints and connections throughout the faucet. They’re found around cartridges, at the base of the spout, and at various connection points inside the faucet body. Because they’re rubber, they degrade with time and heat — usually getting hard and cracking rather than simply wearing flat.
If your drip appears to come from the base of the spout rather than the tip, an O-ring is often the first thing to check. Most O-rings are visible once you remove the spout sleeve and cost pennies each — bringing the old one to the hardware store to match the size is the most reliable approach.
Rubber washer — double-handle compression faucets
Compression faucets are the oldest design still in wide use. Inside each handle, a stem screws down onto a rubber washer, pressing it against a valve seat to stop the water. Every single time you turn that handle, the washer compresses against metal. Years of this eventually flatten or harden the rubber enough that water can squeeze past at the edges — which is exactly what a slow drip sounds like at 2 AM.
Replacing the washer on a compression faucet is the most beginner-friendly faucet repair there is. The part itself costs about $1. The skill involved is minimal. As Serious Eats notes in their kitchen maintenance guide, compression faucet washers are one of the most neglected home maintenance items despite being one of the easiest to fix — most homeowners wait years longer than necessary.
How to Fix a Dripping Kitchen Faucet: Step by Step
Let me be straight with you: the actual repair is usually not the hard part. What trips most people up is not turning off the water supply first, losing a small part down the drain, or putting the cartridge back in facing the wrong direction. Avoid those three mistakes and the repair is genuinely straightforward.
Tools you’ll need before you start
🔧 Gather these before you turn off the water:
- Flathead and Phillips screwdrivers
- Adjustable wrench or basin wrench
- Needle-nose pliers and standard pliers
- Allen key / hex wrench set (many handles use a set screw)
- Replacement part — cartridge, washer, disc, or O-ring (match your model)
- Plumber’s grease (silicone-based — do not use petroleum-based grease on rubber parts)
- Small container or cup to catch any residual water
- Towel for the area under the faucet
Fixing a single-handle cartridge faucet (most common)
This covers the majority of kitchen faucets installed in the last 20 years — Moen, Delta single-handle, Kohler, and most other brands.
- Turn off the water supply valves under the sink — one for hot, one for cold. Turn both clockwise until they stop. Then open the faucet to release any remaining water pressure and clear the lines.
- Remove the handle. Look for a decorative cap on top — pry it off with a flathead screwdriver to expose the screw beneath. Remove the screw (usually Phillips or Allen), then lift the handle straight up off the stem. Some handles require a slight wiggle to break free.
- Remove the cartridge retaining clip or nut. Depending on the brand, there may be a retaining clip (pull it straight up with pliers) or a packing nut (turn counterclockwise with an adjustable wrench). Take a photo on your phone before removing anything — the reassembly sequence matters.
- Pull out the old cartridge. Grip the top of the cartridge with pliers and pull straight up. On older faucets it may be stiff — work it back and forth gently rather than forcing it at an angle. If it’s genuinely stuck, our guide on removing a stuck faucet stem has specific techniques for this situation.
- Compare the old and new cartridges side by side before installing. Confirm the length, width, and notch position match. Orientation matters — most cartridges have a tab or flat side that aligns with a matching groove in the faucet body.
- Apply a light coat of plumber’s grease to the new cartridge’s O-rings and slide it straight down into the faucet body. Press firmly until it seats completely. Replace the retaining clip or nut.
- Reassemble in reverse order — handle, screw, decorative cap. Turn the water supply valves back on slowly, one at a time. Test both hot and cold, and check that the drip has stopped with the faucet fully off.
Fixing a double-handle compression faucet
On compression faucets, only one handle is usually the problem — the side that drips. Work on that handle only.
- Shut off the water supply valve under the sink on the affected side only (hot or cold). Open the faucet to release pressure.
- Remove the handle by prying off the decorative cap and unscrewing the handle screw. Lift the handle off.
- Unscrew the packing nut counterclockwise with an adjustable wrench to expose the stem.
- Unscrew the stem from the faucet body by turning it counterclockwise. At the bottom of the stem, you’ll see the rubber washer held in place by a brass screw.
- Replace the rubber washer. Remove the brass screw, pull off the old washer, and fit a new one of the same size. While you’re in there, inspect the O-ring around the stem and replace it if it looks cracked or hard.
- Reassemble in reverse. Thread the stem back in, tighten the packing nut, replace the handle and cap. Restore water supply and test.
💡 Pro Tip
Before reinstalling any rubber part, coat it lightly with silicone-based plumber’s grease. It extends the life of the washer or O-ring significantly and makes the handle operate much more smoothly. Skip petroleum-based grease — it degrades rubber over time and causes the exact problem you just fixed.
When the Fix Doesn’t Stop the Drip — and What to Do Next
In my experience, about 85% of dripping faucets stop completely after a cartridge or washer replacement. The other 15% have a damaged valve seat — and that changes what comes next.
How to spot a damaged valve seat
The valve seat is the fixed metal surface inside the faucet body that the washer or cartridge presses against to create a seal. Every time the washer seats against it, there’s a small amount of metal-on-rubber contact under water pressure. Over years of use, or after a washer has been worn flat and grinding against the metal for an extended period, the valve seat can develop small pits, grooves, or corrosion.
A damaged valve seat causes the faucet to drip again shortly after a washer replacement — sometimes within days. Shining a flashlight into the faucet body after removing the stem and looking at the seat surface reveals the problem: a good seat looks smooth and even; a damaged one shows visible scoring, pitting, or discoloration.
Some valve seats are replaceable or can be resurfaced with a valve seat grinder tool (available at most plumbing supply stores for around $20). On many modern faucets, though, the seat is molded into the faucet body and not serviceable. In that case, the honest answer is that the faucet needs replacing.
Signs it’s time to replace rather than repair
According to America’s Test Kitchen’s analysis of kitchen fixture repair vs replacement, the tipping point is usually a combination of age, repair history, and parts availability. Here’s a straightforward checklist:
- The faucet is more than 15 years old and this is the second or third repair
- Replacement cartridges or washers for the specific model are hard to find or discontinued
- The valve seat is damaged and not replaceable on this design
- The faucet body shows corrosion, cracks, or physical damage near the base
- Total repair costs (parts plus your time) approach or exceed $80–$100
If any of these apply, a new faucet is almost always the better investment. Our guide on when it’s time to replace a faucet walks through all 8 decision points in detail — it’s worth reading before committing to an expensive repair on an aging unit.
Frequently Asked Questions
Why is my kitchen faucet dripping after the water is turned off?
A worn internal sealing part — cartridge, ceramic disc, O-ring, or rubber washer — is the cause in nearly every case. Water pressure pushes past the worn part and escapes through the spout as a drip, even when the handle is in the fully closed position. Replacing the worn component stops the drip in most cases.
Can a dripping faucet fix itself?
No. The internal part causing the drip continues to degrade with every use, and the drip typically gets worse over time — not better. Left untreated, a dripping faucet also risks scoring the valve seat, which turns a simple $10 repair into a much costlier job. Fix it sooner rather than later.
How much water does a dripping kitchen faucet waste?
A faucet dripping once per second wastes more than 3,000 gallons annually, according to the U.S. EPA’s WaterSense program. At average U.S. water rates, that adds roughly $20–$30 per year to your water bill from a single slow drip. Faster drips — two or three per second — compound the waste and cost significantly.
Is fixing a dripping kitchen faucet a DIY job?
For most households, yes. A cartridge or washer replacement requires basic tools and takes 30 to 60 minutes on a first attempt. The trickiest part is often handle removal, not the repair itself. If the valve seat is scored or the faucet body is cracked, that’s when calling a plumber becomes worthwhile.
How do I know what type of faucet I have?
Count the handles: one handle means a cartridge or ball valve design; two handles usually mean compression or ceramic disc. Check the brand name on the body, look up the model number, and confirm before buying any parts. Cartridges in particular are brand-specific — getting the wrong one means disassembling the whole faucet a second time.
When should I replace the faucet instead of repairing it?
If the faucet is over 15 years old, you’ve made the same repair twice already, replacement parts are discontinued, or the valve seat is damaged and non-serviceable, replacement is usually the smarter long-term call. Our full breakdown of when it’s time to replace a faucet covers all 8 decision points.
Bottom Line
A kitchen faucet dripping after the water is turned off is almost always caused by a worn cartridge, ceramic disc, O-ring, or rubber washer. The fix is usually under an hour and costs between $5 and $20 in parts — genuinely one of the most accessible home repairs you can do yourself.
Start by identifying your faucet type and turning off the water supply before touching anything. Replace the part that matches your faucet design. If the drip returns quickly after replacement, suspect a damaged valve seat and use that as your signal to assess whether repair or replacement makes more sense.
If you decide a replacement is the right move, our roundup of the best rated kitchen faucets walks through the top options by feature and budget — it’ll help you pick a faucet that won’t have you back under the sink in two years. And if low water pressure is part of your problem on top of the drip, our guide to fixing low pressure in a kitchen faucet covers that diagnostic separately.
Fixed your drip with a method I didn’t cover? Or ran into a problem partway through? Drop it in the comments below — I read every one and respond to questions that might help others.