I still remember the frustration. I’d be cooking dinner, and halfway through prepping vegetables, I’d realize I couldn’t see my cutting board anymore. My range hood light had died—just like that. One day it was working fine, the next, nothing but darkness hovering over my stovetop.
If your range hood light is not working, you’re probably dealing with the same annoyance. And honestly? It’s one of those things that feels like it should be a huge problem, but usually isn’t. Most of the time, it’s something simple you can fix yourself in about five minutes. No electrician, no $200 bill, no waiting for an appointment.
Today, I’m walking you through exactly what to check and how to fix it. Whether it’s a burnt-out bulb, a tripped breaker, or something slightly more involved, we’ll figure it out together.
Quick Summary: Range Hood Light Troubleshooting Checklist
- Check if the bulb is burnt out — This is the #1 reason, and replacement takes 60 seconds
- Verify the light switch works — Flip it on and off a few times to confirm it’s responsive
- Inspect the bulb socket for corrosion — Grease buildup can prevent proper contact
- Test the circuit breaker — A tripped breaker cuts power to everything, including the light
- Check for a blown fuse — Older hoods sometimes have inline fuses instead of breakers
- Examine the wiring connections — Loose wires or corroded connectors can interrupt power
- Consider the bulb type — LED, halogen, and incandescent each have different failure patterns
Why Your Range Hood Light Stopped Working (And Why It Usually Isn’t Scary)
Let me be real with you: range hood lights fail for predictable reasons. The good news is that most of them are cheap and easy to fix. The bad news is that understanding what happened helps you avoid the same problem down the road.
Your range hood light sits right above your stovetop, which means it lives in a harsh environment. Heat, steam, grease splatters, and cooking odors surround it constantly. Over time, this takes a toll. The bulb eventually burns out (they always do), or the socket gets dirty, or the wiring corrodes.
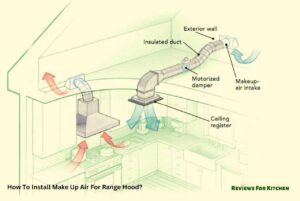
Sometimes the light stops working because the hood itself is having issues. If your range hood suction power is weak, for example, it could indicate broader electrical problems affecting both the fan and the light.
The most common culprit? A burnt-out bulb. Seriously. About 80% of the time, that’s the entire problem. But let’s walk through everything so you know what to look for.
Method 1: Replace the Burnt-Out Bulb (Start Here)
This is where 99% of people should stop and solve their problem. A burnt-out bulb is the most common reason your range hood light isn’t working, and replacing it takes minutes.
What Type of Bulb Do You Need?
First things first: you need to know what bulb your hood uses. There are three main types:
Incandescent bulbs: The traditional kind. They’re warm, they’re cheap ($2-5), and they burn out frequently. If your hood is older, this is probably what you’ve got.
Halogen bulbs: Brighter than incandescent, hotter too. They handle the kitchen environment better but cost a bit more ($8-15). Common in mid-range hoods from the 1990s and 2000s.
LED bulbs: The modern option. They’re bright, they last way longer (sometimes 20,000+ hours), and they generate less heat. Pricier upfront ($15-30), but they pay for themselves over time. If your hood is newer, you likely have LED.
How do you figure out which one you have? Look at the bulb itself. Is it already burned out? Find the original bulb packaging in a cabinet, or check your range hood’s manual. The manual usually lists the exact bulb type and wattage needed.
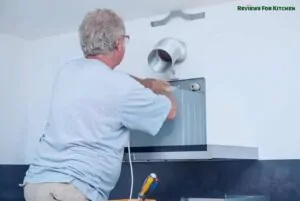
How to Replace Your Range Hood Bulb
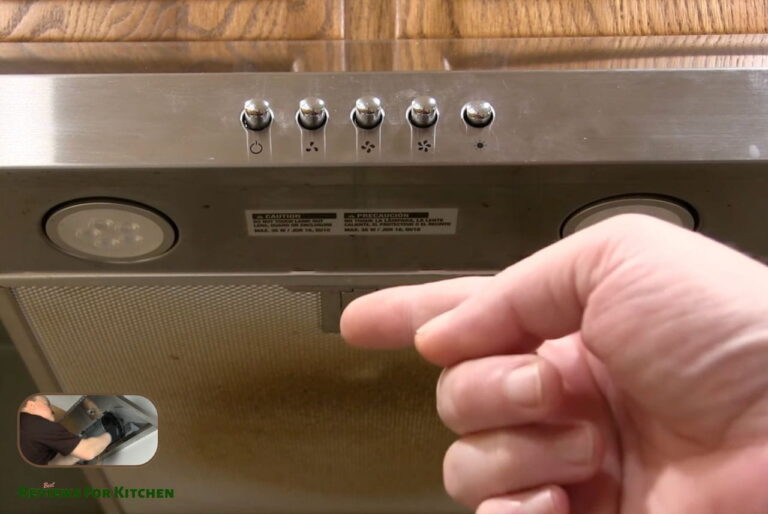
- Turn off the light switch and wait 2-3 minutes for the bulb to cool (it gets hot)
- Locate the bulb—it’s usually under a glass or plastic cover or inside the hood itself
- If there’s a cover, remove it (usually just twists or clips off)
- Gently grasp the old bulb and twist counterclockwise (or straight out if it’s a bayonet style)
- Insert the new bulb and twist clockwise until snug (don’t over-tighten)
- Reinstall any covers you removed
- Turn the switch back on and test
Done. Seriously, that’s it for most people. If your light is now working, close this article and enjoy cooking in proper lighting.
Pro Tip: Buy the Right Wattage
Don’t just grab any bulb that fits. Check your manual or the socket itself—it usually says something like “60W” or “40W.” Using the wrong wattage can overheat the fixture or provide inadequate lighting. Stick with what the manufacturer recommends.
Method 2: Clean the Light Socket (When a New Bulb Still Doesn’t Work)
You replaced the bulb, but the light still won’t turn on? Don’t panic. The socket itself might be dirty.
Grease and dust accumulate inside the socket over time, especially in range hoods that see a lot of cooking action. This buildup prevents the bulb from making proper electrical contact, so even a fresh bulb won’t light up.
How to Clean a Corroded Socket
You’ll need a few simple things: a dry cloth, rubbing alcohol (isopropyl), and maybe a soft brush.
- Turn off the light and let it cool completely
- Remove the light cover if there is one
- Dampen a cloth with rubbing alcohol
- Gently wipe the inside of the socket—the metal contacts especially
- Use a soft brush (like an old toothbrush) to scrub away stubborn grease or corrosion
- Let it dry completely (wait 5 minutes)
- Install a fresh bulb and test
This simple cleaning solves a surprising number of “light won’t work” problems. The electrical contact just needed to be restored.
Method 3: Check Your Circuit Breaker and Power Supply
Still no light? Now we’re moving into slightly deeper troubleshooting. If the bulb is fine and the socket is clean, the problem might be with power delivery to the hood itself.
Test the Circuit Breaker
Your range hood is connected to your home’s electrical panel through a circuit breaker. If something caused that breaker to trip, power cuts to the entire hood—including the light.
Head to your circuit breaker panel (usually in a basement, garage, or utility closet). Look for any breakers that are in the “off” position or in between “on” and “off.” This in-between position typically means it tripped.
If you find one that looks tripped:
- Switch it fully to “off”
- Wait 10 seconds
- Switch it back to “on”
- Go back to your range hood and test the light
If the light works now, great. But here’s the thing: if a breaker keeps tripping, that’s a sign of a deeper electrical issue. We have a full guide on what to do when your range hood circuit breaker keeps tripping, which covers that problem in detail.
Check for an Inline Fuse
Some older range hoods have a small fuse (looks like a tiny tube) instead of relying on the main breaker. If your hood has one, it might be blown. Check your manual for location—it’s usually easy to find and replace. Replacement fuses are super cheap ($2-5 at any hardware store).
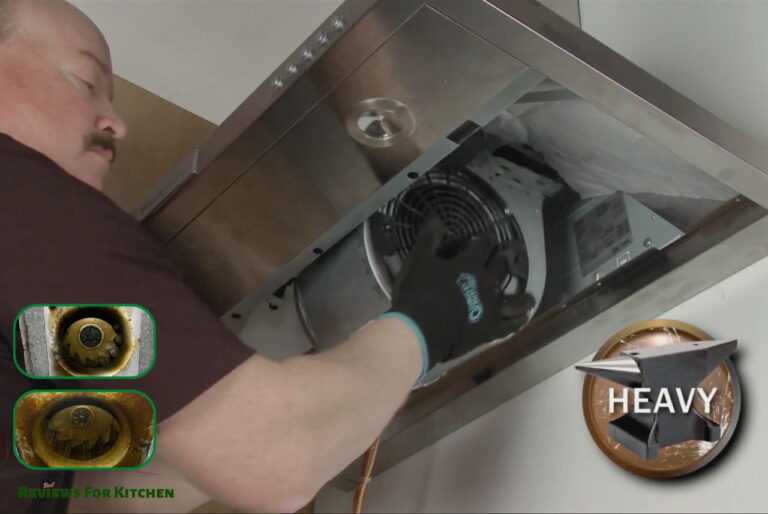
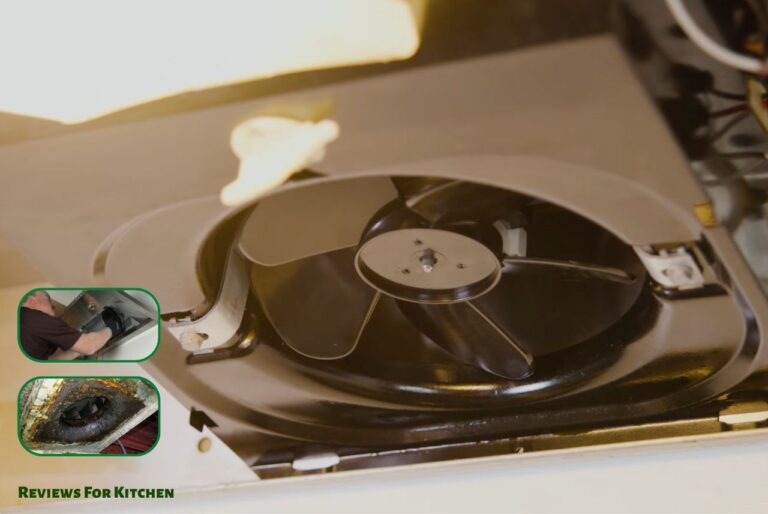
Method 4: Inspect Wiring and Connections (When You’re Getting Handy)
If you’ve made it this far, you’re dealing with something more involved. The bulb is good, the socket is clean, the breaker isn’t tripped—so the problem is likely with the wiring or electrical connections inside the hood.
This is where most homeowners should call a professional. But if you’re comfortable working with electrical connections, here’s what to look for.
What to Check
Turn off the power to the hood at the circuit breaker (flip it to “off” and leave it there). Then carefully inspect the wiring:
- Burnt or melted wires: Black or brown marks indicate previous electrical problems
- Corroded wire terminals: Greenish or white buildup on metal connections prevents current flow
- Loose connections: Wires should be securely fastened, not hanging loose
- Frayed or exposed wiring: This is a safety hazard and needs professional attention
If you spot any of these issues, don’t try to fix it yourself. Call an electrician. Seriously. Electrical work can be dangerous, and it’s not worth the risk.
When You Find Corroded Terminals
If the terminals just look a bit corroded (not burned), you might be able to clean them with rubbing alcohol and a soft brush, then reseat the wires. But again, if you’re not confident, call a professional. There’s no shame in it, and it’s way safer.
Method 5: Understand LED vs. Halogen vs. Incandescent Issues
Different bulb types fail in different ways. Understanding this helps you know whether it’s a simple replacement or a bigger problem.
Incandescent Bulbs
These burn out the fastest (usually 1,000 hours or less). When they fail, they just stop working—no warning, no flickering. Good news: they’re cheap to replace. According to The Kitchn, traditional incandescent bulbs remain popular for kitchen lighting because of their warm color temperature, even if they do require more frequent replacement.
Halogen Bulbs
Halogen bulbs are trickier. Never touch the bulb with bare hands—the oils from your skin can cause hot spots and premature failure. Always use a cloth or paper towel when installing. They last longer than incandescent (2,000-4,000 hours) but fail more suddenly when they do go.
LED Bulbs
LEDs rarely burn out completely. If your LED isn’t working, it’s usually because it’s not compatible with your hood’s electrical system. Some older range hoods have dimmer switches that don’t work well with certain LED bulbs. In that case, you might need a different LED bulb designed for dimmers, or you might need to upgrade the switch itself. It’s less common but more complex to troubleshoot.
Frequently Asked Questions About Range Hood Lights
Q: Can I use any bulb in my range hood, or does it need to be specific?
It needs to be specific. Using the wrong wattage or type can cause overheating or inadequate lighting. Check your manual or the socket marking—stick with what’s recommended. The wrong bulb might look fine, but it could damage the fixture over time.
Q: Why does my light flicker instead of staying on?
Flickering usually means a loose connection somewhere—either the bulb isn’t seated properly, the socket is dirty, or there’s a loose wire inside. Try removing and reinserting the bulb first. If that doesn’t work, clean the socket. If flickering persists, you might have a wiring issue that needs professional attention.
Q: How often should range hood lights be replaced?
It depends on the bulb type. Incandescent bulbs last 1,000-2,000 hours. Halogen bulbs last 2,000-4,000 hours. LED bulbs last 25,000+ hours. If you cook frequently, expect to replace incandescent bulbs every 6-12 months. LEDs might last several years.
Q: My range hood light is dim but still works. Should I replace the bulb?
A dimming light often means the bulb is nearing the end of its life. Replace it before it burns out completely. It’s cheaper and easier to replace a bulb on your schedule than to deal with a completely dead light while you’re trying to cook.
Q: Is it safe to replace the bulb myself?
Yes, bulb replacement is safe and simple. Just make sure the light is off and the bulb has cooled before you touch it. Wear a thin glove or use a cloth if you’re replacing halogen bulbs (never touch them bare-handed). If you’re doing anything beyond simple bulb replacement, turn off the circuit breaker first.
Q: What if the light still won’t work after I’ve tried everything?
If you’ve replaced the bulb, cleaned the socket, checked the circuit breaker, and the light still won’t work, you likely have a wiring or component issue that needs professional diagnosis. Call a licensed electrician. It’s not worth guessing at electrical problems.
The Bottom Line: Most Range Hood Light Problems Are Simple
Here’s what I want you to remember: when your range hood light stops working, your first instinct—replace the bulb—is right about 80% of the time. Don’t overthink it. Grab a new bulb of the correct type, pop it in, and you’re done.
For the remaining 20%, we’ve covered the most common fixes. Clean the socket. Check the breaker. Verify the power is getting there. Most of these are still DIY-friendly.
The only time you really need to call someone is if you spot burned wires, melted components, or loose electrical connections. Don’t mess with that. But the simple stuff? You’ve got this.
And if your range hood has other issues alongside the broken light—like poor ventilation or strange noises when it’s off—those are separate problems we can help you troubleshoot too. But the light itself is usually the easiest thing to fix on your entire hood.