
I’ll be honest—I was terrified the first time I tried to install a range hood. I’d never done anything like it before. Electrical connections, ductwork, mounting hardware—it all felt impossibly complicated. I almost called a professional just to avoid the stress.
But I pushed through. And you know what? The installation wasn’t nearly as scary as I’d imagined. Once I understood the basic process, it was actually manageable. That’s when I realized: a lot of people are intimidated by range hood installation when they shouldn’t be.
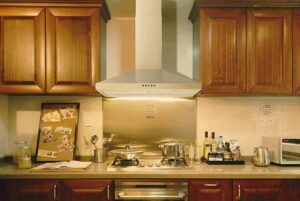
This guide walks you through an ultimate vented range hood installation step by step. Whether you’re replacing an old hood or installing one in a new location, you’ll find the exact process here. We’ll cover everything from planning and measurements to final electrical connections. By the end, you’ll know exactly what you’re doing—and whether it’s a DIY job for you or something that needs a professional.
Quick Summary: Your Installation Roadmap
- Gather tools and materials first — You’ll need a drill, screwdrivers, level, tape measure, and proper safety equipment
- Plan your ductwork route — This is the most critical step; measure twice before any installation begins
- Turn off power and prepare the space — Never work with live electrical; protect your surrounding kitchen
- Mount the hood securely — Proper mounting ensures safety and prevents future vibration issues
- Install and seal ductwork — Poorly sealed ducts lose efficiency; use mastic, not duct tape
- Make electrical connections carefully — Hire an electrician if you’re not confident with wiring
- Test everything before calling it done — Function check catches problems before they become expensive
Before You Start: Planning and Safety Preparation
Here’s the thing about range hood installation: most problems happen because people skip the planning stage. They rush to mounting and then realize the ductwork won’t work, or the electrical connection is impossible. Spend time planning, and the actual installation becomes straightforward.
Assess Your Current Situation
First, figure out what you’re working with. Are you replacing an existing hood or installing one where nothing exists? Is there already ductwork, or are you building it from scratch? Does your kitchen have an accessible path to the outside?
These answers determine whether this is a weekend DIY project or something requiring professional help. A simple replacement of an existing hood? Probably DIY-able. Routing new ductwork through walls? That’s getting into professional territory.
Gather Your Tools and Materials
Before you touch anything, make sure you have what you need:
- Drill with assorted bits
- Screwdrivers (Phillips and flathead)
- Level (crucial for proper mounting)
- Tape measure
- Drywall saw (if cutting new holes)
- Tin snips (for duct work)
- Mastic sealant and metal foil tape (for ductwork sealing)
- Safety glasses and work gloves
- Voltage tester (for electrical safety)
Having everything ready before you start saves massive frustration halfway through.
Turn Off Power at the Breaker
This is non-negotiable. Before you touch anything electrical, flip the appropriate circuit breaker to “off” and use a voltage tester to confirm the power is actually off. Don’t guess. Electrical work demands respect.
Step 1: Plan Your Ductwork Route (The Most Important Step)
I can’t overstate this: your ductwork route makes or breaks a successful installation. You can’t just improvise while you’re installing. You need to know exactly where that duct is going before you start.
Determine Your Exit Point
Your hood needs to vent to the outside of your home. Options include:
- Through the roof (most common for under-cabinet hoods)
- Through an exterior wall (common for kitchens near outside walls)
- Through existing ductwork (if you’re replacing an old hood)
If you’re venting through the roof, check for obstacles like attic beams, joists, or existing utilities. If you’re venting through a wall, make sure you’re not cutting through studs or damaging the home’s structure. For detailed guidance on this specific process, our guide on how to vent a range hood through a roof covers the specifics of this installation method.
Measure Your Ductwork Path
Measure the distance from your hood location to your exit point. This tells you how much ductwork you need. Also note any bends or turns—each turn reduces airflow efficiency, so minimize them.
Pro tip: The shortest, straightest path wins. Avoid long horizontal runs or multiple 90-degree bends if possible. Every complication makes your hood less effective.
Plan for Duct Size
Most residential hoods use 6-inch ducts. Some larger models need 8-inch. Verify your hood’s specs and match your ductwork accordingly. Never downsize ducts to save money—undersized ducts destroy your hood’s suction.
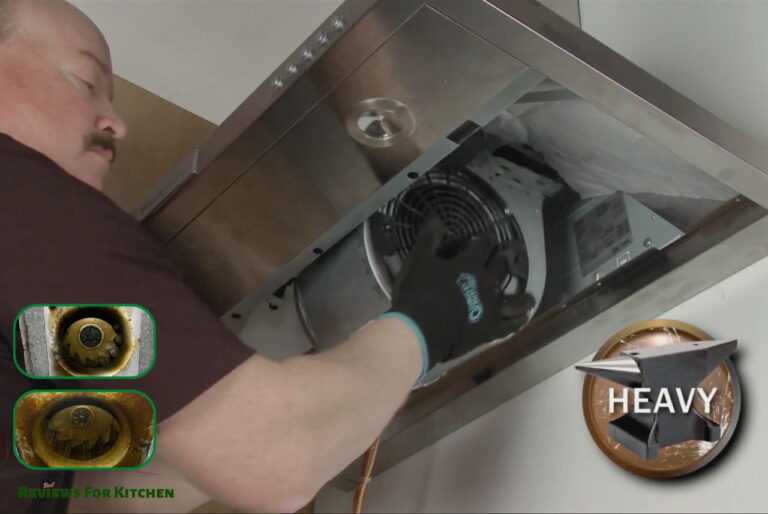
Step 2: Mount the Hood Securely (Getting It Level and Stable)
Your hood needs to be mounted properly. Weak mounting causes vibration, noise, and potential safety issues.
Determine Hood Height and Positioning
Range hoods should typically sit 20-24 inches above your cooktop. Check your hood’s manual—it should specify the recommended height. Use a level and tape measure to mark where the top of the hood will sit on your cabinetry or wall.
Make sure the hood extends beyond your cooktop. You’ve probably seen hoods that are narrower than the stove—they don’t work as well. Ideally, your hood is at least as wide as the cooktop, and it should extend 1-2 inches beyond on each side. For specific guidance on hood extension, check our resource on how far a range hood should stick out.
Find Your Mounting Points
Under-cabinet hoods mount directly to cabinetry using provided hardware. Locate the studs or reinforced areas in your cabinet. Mark your mounting holes with a pencil. Use a level constantly—this is not the time to eyeball it.
Never, ever skip this step. An uneven hood looks wrong and stresses the mounting hardware unevenly, causing premature failure.
Drill and Secure Mounting Hardware
Follow your hood’s manual exactly. Drill pilot holes first (smaller than your screws), then secure the mounting brackets. Hand-tighten first, then use a screwdriver for final tightening. Don’t over-tighten—you’ll crack the hood or strip the hardware.
Once mounted, use your level again. Check side-to-side and front-to-back. Adjust if needed before moving on.
Step 3: Install Ductwork (Seal Everything Properly)
This is where efficiency happens—or doesn’t. Sloppy ductwork sealing wastes suction and means your hood won’t work as intended.
Connect Hood to Ductwork
Your hood has a duct collar where the ductwork connects. Attach the first section of ductwork (usually 6-inch rigid aluminum ducting) to this collar. Use metal foil tape and mastic to seal the joint completely. No gaps, no shortcuts.
Run Ductwork to Exit Point
If you’re routing through the attic and roof, you’ll need to:
- Drill a hole through the roof (from inside, finding the mark from your attic)
- Run the duct from the hood through the attic to the roof opening
- Attach a roof flashing and vent cap on the outside
- Seal everything with roofing caulk to prevent leaks
If conditions are unusual—like a slanted ceiling—installation gets trickier. We have specific guidance on how to install a range hood on a slanted ceiling that covers those special cases.
Seal Every Joint With Mastic, Not Duct Tape
I see this mistake constantly: people use regular duct tape to seal ductwork. Don’t. Duct tape deteriorates in the heat and humidity of a kitchen duct system. Use mastic (a sticky sealant) and metal foil tape instead. It stays sealed, it lasts years, and your hood maintains full efficiency.
Apply mastic around each connection point, then wrap with metal foil tape. This double-seal approach handles temperature changes and vibration without failing.
Install a Damper at the Exit
At your exterior vent cap, there should be a damper—a small flapper door that opens when air flows out and closes when the hood isn’t running. This prevents cold air and pests from entering. Make sure it’s installed and functioning freely.
Step 4: Electrical Connection (Know Your Limits)
Here’s where I’m going to be direct: if you’re not comfortable with electrical work, hire a licensed electrician. This isn’t the place to learn on the job.
That said, if you understand basic electrical and your local codes allow it, here’s the process:
Identify Power Source
Your hood needs a dedicated 120V circuit (for standard residential hoods). Some larger models need 240V. Check your hood’s specs and make sure you have appropriate power available. Never use an existing circuit that powers other appliances—that’s asking for problems.
Run Electrical Wire
If power isn’t already there, you’ll need to run new wire from your circuit breaker to your hood location. This typically requires running wire through walls or cabinetry. If you’ve never done this, stop here and call a licensed electrician. Running wire incorrectly causes fires.
Make the Connection
Once power is available at the hood location, connect the hood’s wiring according to the manual. Typically this means:
- Connecting the ground wire (green or bare)
- Connecting the neutral wire (white)
- Connecting the hot wire (black)
- Securing connections with wire nuts
- Wrapping with electrical tape if needed
All connections should be secure and insulated. Double-check before you test power.
Install Breaker and Test
If this is a new circuit, install a breaker in your electrical panel (or have a licensed electrician do it). Turn on the breaker, then test your hood. Lights on? Fan running? Success.
If you’re considering make-up air installation alongside your hood, that’s another electrical consideration. Our guide on how to install make-up air for a range hood covers the electrical and ventilation aspects of that optional upgrade.
Step 5: Install Filters and Test Everything
You’re almost done. Final steps are simple but crucial.
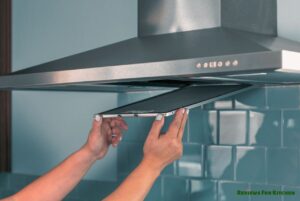
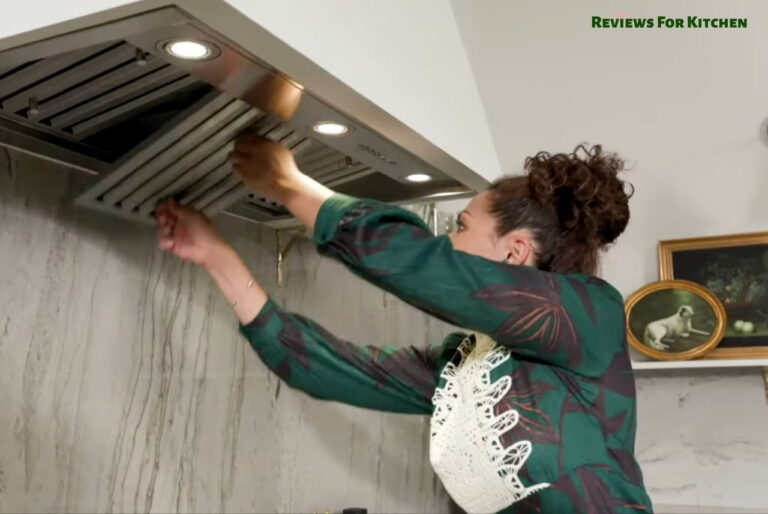
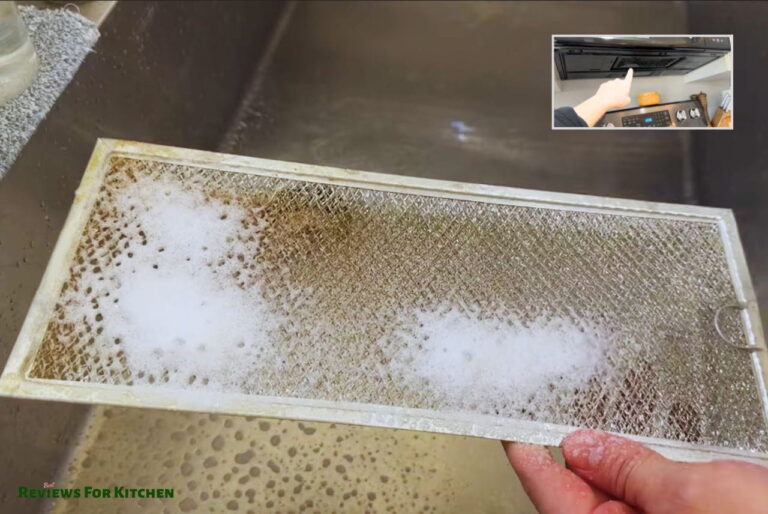
Insert Your Filters
Install your range hood’s filter (mesh, baffle, or charcoal depending on your model) according to the manual. Make sure it’s seated properly—loose filters leak air around the edges instead of through the filter, which defeats the purpose.
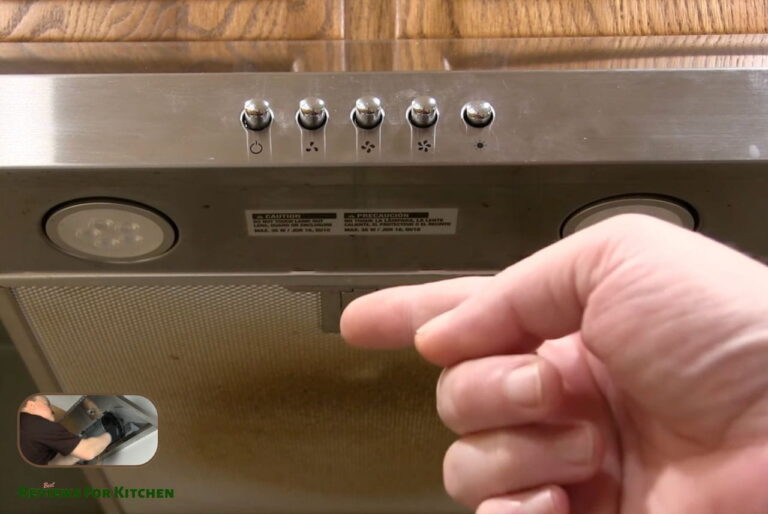
Run the Hood and Listen
Turn on your hood at all speed settings. Listen for unusual noises. Watch for vibration. Place a tissue near the filter—it should be drawn toward the hood with obvious force. If something feels wrong, turn it off and investigate before using it regularly.
Check for Leaks and Air Escape
Run the hood and carefully inspect all ductwork joints from the inside (and outside if accessible). You shouldn’t see light coming through gaps, and you shouldn’t feel air escaping from seams.
Frequently Asked Questions About Range Hood Installation
Q: Can I use flexible dryer vent hose for range hood ductwork?
No. Flex hose traps lint and grease, reducing efficiency and creating fire hazards. Use rigid metal ducting. It costs more but it works properly and lasts.
Q: What if I don’t have a clear path to the outside?
Then you likely need to consider a ductless (recirculating) hood instead of a vented hood. For details on ductless installation, see our guide on how to install a ductless range hood, which covers various mounting scenarios.
Q: Do I need a permit for range hood installation?
Check your local building codes. Many jurisdictions require a permit for electrical work and roof penetrations. Don’t skip this—unpermitted work can complicate home sales and creates liability issues.
Q: How long does installation typically take?
A simple replacement of an existing hood? 2-4 hours. New installation with existing ductwork? 4-6 hours. New ductwork routing? Can take a full day or more. Plan accordingly.
Q: What if my kitchen has a slanted ceiling?
That adds complexity, but it’s not impossible. Check out our specific guide on the topic for detailed instructions on navigating angled or vaulted ceilings.
Q: Should I hire a professional or do this myself?
If you’re handy, comfortable with tools, confident about electrical work, and understand basic plumbing/construction, DIY is reasonable. If any of those give you pause, hire a professional. The cost of a mistake (fire, structural damage, system failure) far exceeds what you’ll save doing it yourself.
The Bottom Line: Plan First, Execute Carefully
Here’s what I want you to take away: range hood installation isn’t magic. It’s a straightforward process if you plan properly and take your time. The people who struggle are usually the ones who skip planning and improvise during installation.
Spend extra time on your ductwork route. Get your mounting absolutely level. Seal every joint properly. Make electrical connections correctly (or hire someone who can). Test everything before you consider it done.
If any step—particularly the electrical work—makes you uncomfortable, there’s no shame in hiring a professional. Your time and safety are worth something. But if you’re willing to put in the effort and follow the process, you absolutely can install a vented range hood successfully.
Start with understanding your specific situation—your ceiling type, your ductwork route, your electrical setup. Then follow the steps methodically. Before you know it, you’ll have a working hood that’s properly installed and ready to keep your kitchen clean and fresh for years to come.
People also search for
- How To Install a Range Hood on a Slanted Ceiling
- How To Vent a Range Hood Through a Roof | Easy Guide
- 4 Ways To Determine How Far a Range Hood Should Stick Out
- How to Choose the Best Vented Range Hood for Your Kitchen
- 5 Best Vented Range Hood for Your Healthy Kitchen
- Best Ducted Range Hoods for Gas Stoves