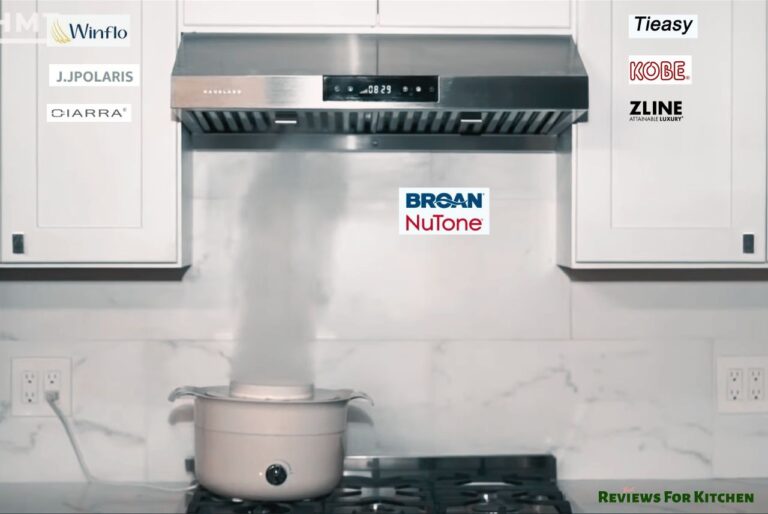

There’s nothing quite like cooking a steak, frying bacon, or simmering a fragrant curry—until you realize your range hood is basically just blowing air around your kitchen instead of actually pulling out the smoke and smell. I’ve been there. About three years ago, my kitchen would smell like last night’s dinner the entire next day, and I couldn’t figure out why. My range hood was running (I could hear it), but the suction was practically nonexistent.
If you’re experiencing weak suction from your range hood, you’re definitely not alone. This is one of the most common complaints I hear from friends and family, and honestly, it’s usually fixable without calling an expensive repair person. Today, I want to walk you through exactly how to increase suction power in your range hood—whether the issue is something simple like a dirty filter or something that needs a bit more troubleshooting.
The good news? Most of the solutions are straightforward. Many homeowners don’t realize that poor ventilation often comes down to maintenance, blockages, or a few tweaks you can handle yourself. Let’s get into it.
Quick Summary: Your Range Hood Suction Checklist
- Clean or replace your filters — This is the #1 culprit for weak suction and takes 10 minutes
- Check for ductwork blockages — Lint, grease, and debris accumulate faster than you’d think
- Inspect the damper — A stuck or failing damper prevents proper airflow
- Verify proper duct sizing — Undersized ducts kill suction before it starts
- Test your exhaust fan motor — Sometimes the motor itself loses power over time
- Ensure tight connections — Leaky ducts waste suction you can’t afford to lose
- Remove external obstructions — Birds, nests, and debris block the vent cap on your roof or wall
Why Your Range Hood Suction Feels Weak (The Real Reasons)
Before we jump into solutions, let’s talk about why this happens in the first place. Understanding the root cause helps you fix it and prevent it from happening again.
Your range hood works by pulling air (and cooking fumes) through a filter, then either recirculating it back into your kitchen or exhausting it outside through ductwork. The moment something blocks that path, your suction power drops—sometimes dramatically. According to America’s Test Kitchen, proper ventilation is one of the most overlooked aspects of home cooking setup, yet it directly impacts both your kitchen experience and the longevity of your appliances.
Here’s the thing: your range hood is constantly fighting against resistance. The filters trap grease particles. The ductwork collects lint and buildup. The damper (that flapper door at the end of your exhaust duct) can stick closed. Each of these issues creates friction that slows down airflow. Add them all together, and your powerful exhaust fan becomes just a gentle breeze. If you’re not sure how to measure this, we have a complete guide on how to test range hood suction properly.
The most shocking part? A completely clogged filter can reduce suction by 50% or more. I didn’t believe this until I tested it myself—cleaned my filter and suddenly the hood was pulling smoke out like it was supposed to.
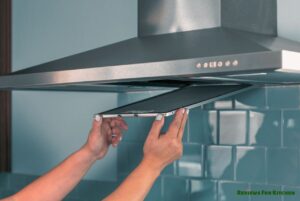
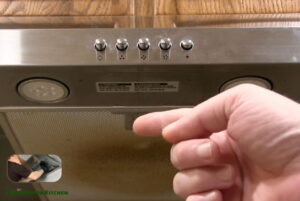
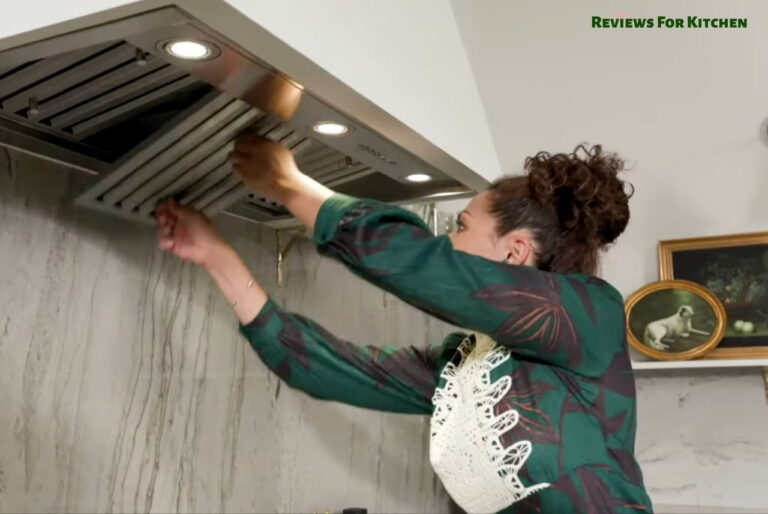
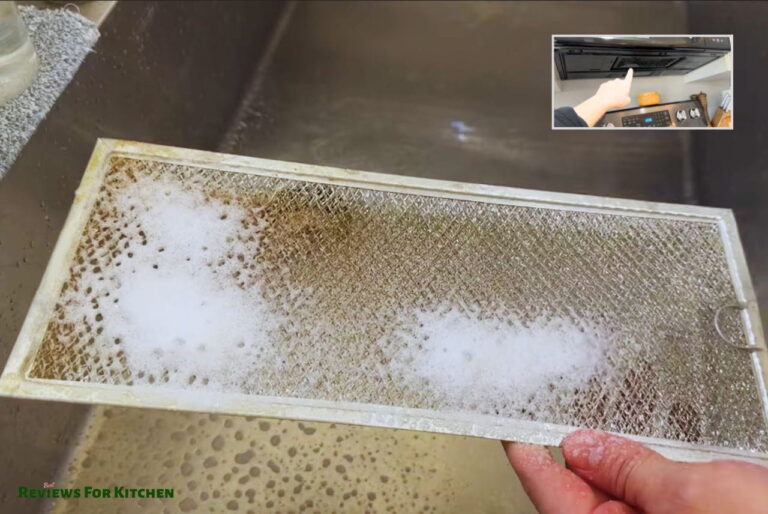
Method 1: Clean or Replace Your Range Hood Filters (Start Here)
I’m putting this first because it’s the most common reason for weak suction, and it’s the easiest fix. Seriously, if you only do one thing today, do this.
There are generally two types of filters: mesh and baffle filters.
Mesh Filters
These are the accordion-style screens you see in most under-cabinet hoods. They trap grease particles but aren’t as aggressive as baffle filters.
How to clean them:
- Turn off your range hood and let it cool for 5 minutes
- Slide or unscrew the filters (your manual will show you how)
- Fill your sink or a large pan with hot water and a generous squirt of degreaser (like Dawn dish soap or a commercial range hood cleaner)
- Soak the filters for 10-15 minutes
- Scrub with an old toothbrush or soft brush, working from top to bottom
- Rinse thoroughly under hot running water
- Shake off excess water and let them air dry completely before reinstalling
Pro tip: Do this monthly if you cook frequently, or every 2-3 months for light cooking. Your future self (and your suction power) will thank you. Regular maintenance keeps all your range hood components running smoothly—from suction to the light inside (which can have its own issues, covered in our guide to fixing range hood lights).
Baffle Filters
These solid, curved filters are tougher and capture more grease. They’re harder to damage but also accumulate buildup faster.
The cleaning process is basically the same, but you might need a degreaser that’s a bit stronger. Some people even throw them in the dishwasher on a light cycle—check your manual first to see if that’s approved for your model.
When to Replace Instead of Clean
If your filters are super deteriorated, have holes, or don’t come clean after soaking and scrubbing, it’s time to buy new ones. Filters typically cost $20-$60, which is way cheaper than a repair call. Replacement filters are usually easy to find online by your hood’s model number.
Method 2: Inspect and Clear Your Ductwork (The Hidden Culprit)
Here’s where a lot of people get stumped. Your filters look fine, but the suction is still weak. Chances are, your ductwork is partially blocked.
Ductwork can get clogged with:
- Lint and dust buildup
- Dried grease (yes, it hardens inside your ducts)
- Food particles
- Insulation debris (if your ducts pass through unconditioned spaces)
This buildup acts like a partial blockage, forcing your exhaust fan to work way harder and reducing the actual airflow leaving your kitchen. This is often the root cause behind a range hood that’s not venting properly—something we dive deeper into in our troubleshooting guide for poor ventilation.
How to Check and Clean Your Ducts
If your ducts are accessible: You can clean them yourself. Turn off the hood, disconnect the ductwork (usually held with metal clips or screws), and use a brush or shop vac to clear out visible debris. A flexible duct brush (about $15-30 online) works great for this.
If your ducts run through walls or aren’t easily accessible: This is where professional duct cleaning comes in. It’s not cheap—usually $300-$500—but it’s the most thorough option. Companies use specialized equipment to flush out years of buildup.
Honestly? I clean my accessible ductwork twice a year now. It takes about 30 minutes, and the difference in suction is immediate.
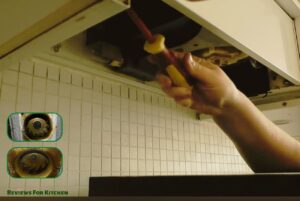
Method 3: Check the Damper (That Flapper You Forgot About)
Your range hood has a damper—a small flapper door at the end of your exhaust duct that opens when the fan runs and closes when it stops. This prevents cold air (and pests) from flowing back into your kitchen.
When the damper gets stuck, your suction tanks.
Why does it get stuck? Grease buildup, lack of movement, rust, or debris stuck between the flapper and its frame.
How to Check and Fix Your Damper
If your ductwork is accessible, you can inspect it visually. Look at the end of the duct outside your home (where it exits through the wall or roof). The damper should be a small door-like flap. Try gently pushing it—it should open and close smoothly.
If it’s stuck:
- Turn off the range hood
- Carefully pry the damper open using a flat tool (like a paint scraper)
- Clean around the edges with a wire brush to remove grease and debris
- Spray with a silicone-based lubricant (NOT WD-40—it’s too heavy for this)
- Work the damper open and closed 10-15 times to get it moving freely
If the damper is damaged or rusted beyond saving, you can replace it. A new damper costs about $30-$75, and installation is usually straightforward. For a complete deep dive on damper troubleshooting, check out our guide on how to fix a range hood damper that’s not closing properly.
Method 4: Verify Your Duct Size and Configuration (The Installation Problem)
Here’s something a lot of people don’t think about: improper duct sizing or routing can kill suction from day one.
Your range hood needs the right diameter ductwork to function properly. Most under-cabinet hoods use 6-inch ducts, while some larger island hoods need 8-inch. If someone installed your hood with undersized or overly flexible ductwork, that’s your problem.
What to Look For
Walk to where your ductwork runs (usually through a cabinet or wall). Ask yourself:
- Is the ductwork the correct size for your hood? (Check your manual for specs)
- Are there unnecessary bends or turns? (Each turn reduces airflow efficiency)
- Is flexible aluminum ductwork sagging between supports? (Sags create pockets where air pressure drops)
- Are duct connections tight and sealed? (Loose connections let conditioned air escape)
If the ductwork was installed incorrectly, fixing it might mean hiring a HVAC professional. But if it’s just sagging or loose connections, you might be able to tighten things yourself. Support sagging ducts with metal brackets, and seal loose connections with mastic (a duct-sealing compound) or metal foil tape—not duct tape, which degrades over time.
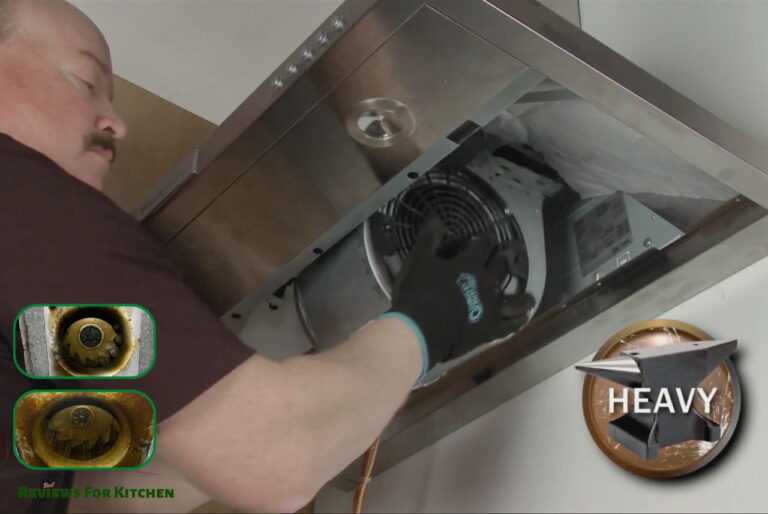
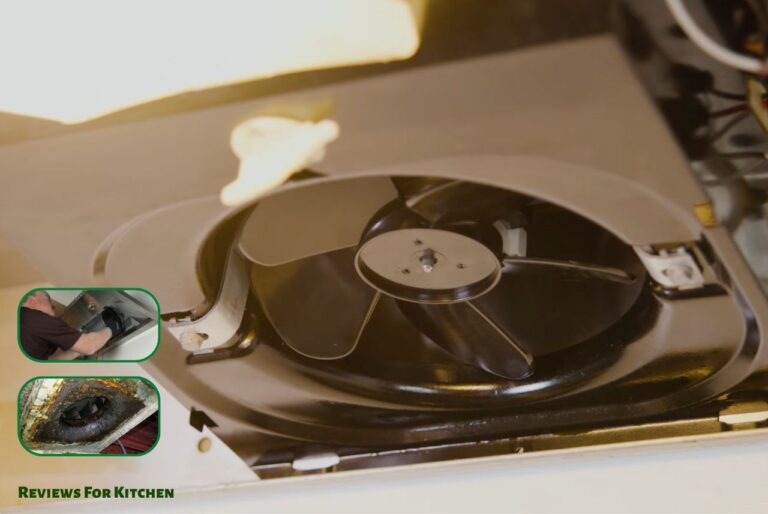
Method 5: Test Your Exhaust Fan Motor (When It’s Not Just a Clog)
Okay, you’ve cleaned the filters, cleared the ductwork, fixed the damper, and checked the installation. The suction is still weak. Now we’re looking at the motor itself.
Over time, exhaust fan motors lose power. It’s not a dramatic failure—you can still hear it running—but it’s not pulling with the force it once did.
Quick Motor Test
Turn on your hood on high speed and place a piece of tissue paper near the filter. It should be sucked against the filter pretty firmly. If it barely flutters, your motor might be failing. (This is different from a situation where your fan runs but there’s no suction at all—which usually points to a different issue.)
If the motor is failing: You have two options. Replace just the motor (if available for your model—usually $150-$400), or replace the entire hood. Motor replacement is a job for someone handy with electrical work, or you can call a professional. (Note: if your range hood keeps tripping the circuit breaker, that’s another electrical issue we cover in our guide to range hood electrical problems.)
Method 6: Seal Air Leaks in Your Ductwork (The Efficiency Booster)
Even small air leaks in your ductwork waste precious suction. If your ducts have holes, loose connections, or gaps, some of that powerful airflow is escaping before it even reaches the exhaust.
Finding and Sealing Leaks
Inspect all visible ductwork for:
- Small holes or tears in the metal
- Connections that aren’t fully seated
- Gaps where ducts meet walls or cabinetry
Use mastic and mesh tape or metal foil tape to seal these areas. I avoid duct tape—it just doesn’t hold up to the temperature and humidity variations in your kitchen. Mastic stays flexible and actually seals (unlike duct tape, which hardens and peels).
This is a quick, inexpensive fix that can noticeably improve suction if you’ve got multiple small leaks.
Method 7: Remove External Obstructions (The Last Resort)
Your exhaust vent cap on the outside of your home is the final point in the suction chain. If something blocks it, your hood can’t work properly.
Common External Blockages
- Bird nests or debris inside the vent cap
- Ice buildup (in cold climates)
- Heavy lint accumulation around the opening
- A damper flapper stuck closed (we covered this earlier)
- Vegetation growing around the vent
Check your vent cap from outside your home (safely—use a ladder if needed). Clear any visible blockages. Make sure the damper flapper opens freely. (If you notice your hood is making noise when it’s off, that’s often related to damper or vent cap issues—read our post on how to stop range hood noise when off for more details.)
If you want to prevent future problems, install a vent cover designed to keep pests and debris out while still allowing proper airflow. These cost about $30-$50.
Frequently Asked Questions About Range Hood Suction
Q: How often should I clean my range hood filters?
If you cook daily or use your hood frequently, monthly is ideal. Light cooking? Every 2-3 months works. The best way to tell: when suction starts feeling weak, it’s time to clean.
Q: Can I use a recirculating hood if my suction is too weak?
A recirculating (ductless) hood filters air and sends it back into your kitchen instead of exhausting it outside. They’re easier to install but less effective than properly functioning ducted hoods. Better to fix the ducted hood first.
Q: Does the type of cookware affect my range hood suction?
Not really. The size and style of your hood matter way more. But cooking methods do—simmering pots and stovetop cooking produce different amounts of steam and smoke than grilling, so you might notice more or less need for ventilation depending on what you’re making. As Serious Eats points out in their kitchen science guides, understanding how different cooking techniques produce vapor and heat helps you appreciate why good ventilation is so critical in the modern kitchen.
Q: Is hiring a professional worth it if I’m not handy?
If it’s just filter cleaning or checking the damper, definitely DIY. But if you suspect ductwork issues, improper installation, or motor failure, a professional HVAC technician can diagnose the problem accurately and save you from making a costly mistake.
Q: Why does my hood work fine sometimes but feels weak other times?
This usually means your damper is partially stuck or your filter is getting progressively more clogged. It’s also possible temperature differences outside affect airflow (cold air is denser), but that’s less common. (If your hood is randomly turning on by itself, that’s a different electrical issue—we have a troubleshooting guide on why your range hood turns on by itself.)
Q: Can I make my old range hood more powerful?
You can improve efficiency by ensuring everything is clean and properly installed, but you can’t increase the raw power of an older motor. If you need more suction, replacing the hood with a higher CFM (cubic feet per minute) model might be necessary.
The Bottom Line: Better Suction Starts With Maintenance
Here’s what I’ve learned after dealing with this myself: most weak suction problems come down to preventive maintenance. A clean filter and clear ductwork solve the problem about 80% of the time.
Start with the easy wins. Clean your filters today. Walk through your ductwork tomorrow. Check that damper this weekend. These simple steps usually restore suction power without spending a dime (besides maybe $15 for supplies).
If none of these methods fix the problem, then you’re looking at a professional diagnosis. But honestly, I’d be surprised if you get that far. The suction issues I hear about most turn out to be something straightforward—just needed a little attention.
Try one (or all) of these methods and let me know which one solved your problem. Seriously, I love hearing what actually works for people, and it helps me keep giving you real, tested advice. And if you’re dealing with other range hood issues, we’ve got guides on fixing a range hood light that’s not working and troubleshooting a range hood that’s not venting properly that might help too.
Your kitchen (and your nose) will thank you.
People also search for
- How to Test Range Hood Suction | Methods and Quick Guide
- How to Fix a Range Hood That’s Not Venting Properly
- How to Clean Range Hood Duct
- How to Maintain Range Hood Filters for a Cleaner Kitchen
- What Is the Best Range Hood for Grease Removal?
- 5 Best Range Hood for Chinese Cooking to Remove Heavy Grease & Smoke