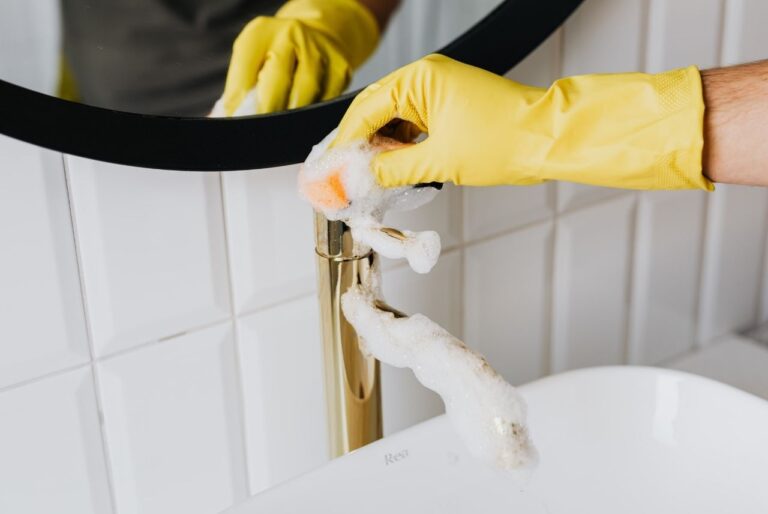
Anyone can say, cleaning a kitchen faucet is a pain. I say ‘very easy’ besides, you get to know the proper way to clean it. Don’t get amazed, there are also rules and specific ways of cleaning a kitchen faucet. If you know the smart way to clean it, you will get it as an easy task. Plus, it will increase the durability of the kitchen faucet. Today, I’m going to discuss the topic “How to clean kitchen faucets?” So, let’s get into the main topic. (Before getting started, I am suggesting a topic best kitchen sink reviews, click for details)
How to clean a Kitchen Faucet?
Here is a detailed guide on how to clean a faucet safely without harming its components. It involves the basic cleaning process, the deep cleaning process, and some tips to avoid damaging the natural appearance of your faucet.
The Basic Maintenance
Remove the Soft Stain
First, I will discuss how to perform basic cleaning such as soft stain cleaning, hard stain cleaning, disinfecting, etc.
Remove the Hard Stain
You hopefully won’t need any solution or cleaning agent to clean the soft stains. Most of the time, simply washing the faucet with a soft sponge and water does the trick.
Take a wet rag and wipe the areas that seem to have started to form soft stains. Wash it with water and you will see no more smudge.
Remove the Hard Stain
To remove the harder stains, now you’ll need gentle cleaners such as Windex, Fantastik, Formula 409, or others
Take a rag and dip it in the water and cleaner mixture. Now, wipe down the hard stains, and apply pressure if necessary.
Disinfect the Faucet
If you think your kitchen faucet has contact with germs or bacteria, then disinfect the faucet. I recommend bleach or vinegar to disinfect the faucet.
How to Make A Vinegar Solution and Disinfect?
In addition to being an excellent cleaner, vinegar has been found to have some disinfectant properties as well.
Take a mug and mix an equal amount of white vinegar and water. Leave the solution on the surface for 10-20 minutes before cleaning and wiping off.
How to Make A Bleach Solution and Disinfect?
When properly diluted, a bleach solution can be effective to kill the remaining germs on the surface after the cleaning process. Take 1 tablespoon of regular unscented household bleach and a quart of water. Mix them properly. And leave the solution on the surface for at least 1 minute before wiping it away
Before beginning the process, follow the bleach product’s label instructions, and see whether any safety equipment, like gloves or eye protection, is required. It’s better to use gloves no matter what.
N.B. Never combine household bleach or any other cleaning agents, it may create vapors extremely harmful to breathe in.
The Deep Cleaning Process
Dealing with hard water deposits and stains on the faucet can be a daily challenge. They build up over time on the surface and even the aerator, making the appearance absolutely unpleasant, and may damage your fixtures’ performance too!
Deep cleaning these filthy build-ups can be tough, but not impossible. Here are the how-tos!
Cleaning the Faucet Limescales
Have you noticed chalky deposits on your faucets? Chances are, they are limescale build-ups, which are basically white mineral deposits resulting from hard water. These scaly bits settle over time and are harder to remove, sometimes making it tough for water to flow too.
Ammonia is the best solution to clean limescale deposits that I know of. Besides being an effective cleaner, handling it is easier compared to many other chemical cleaning agents.
How to make an ammonia solution?
Take equal parts ammonia and water in a bowl and mix them together.
The Process:
- Soak a clean rag in the ammonia solution and enfold the faucet with it, making sure it has direct contact with all areas with lime scales.
- Use an elastic band to secure the rag in place and let it sit for at least 30 minutes to an hour. (Every now and then, squeeze the cloth to push extra solution onto the faucet)
- Remove the rag and Wipe the area clean.
- As soon as you clean it, run hot water through the faucet itself for a couple of minutes. It will banish traces of ammonia.
Removing the Black/Dark-Brown Deposits from Faucet
Even a reasonably new kitchen faucet can soon develop hard water deposits anyplace making it appear worn and dingy. The dark brown and black spots are the result of the build-up of iron and manganese in the place where water tends to collect. These stains aren’t permanent, but they can be tough—everyday cleaning can not totally remove them
In such cases, you can either use a non-toxic hard water stain remover (Kaboom Foam-Tastic can be helpful) to get the job done, or a self-made mixture of cream or tartar can be effective too (tartaric acid, hydrogen peroxide)
How to Create the Mixture?
Wear gloves, and in a deep bowl, mix tartaric acid and hydrogen peroxide together to create a paste. Take special caution to avoid any contact with hydrogen peroxide
The Process
- Dip a clean rag in the paste and apply it over the faucet, making sure all of the black and brown hard water spots are covered.
- Let it sit for about 20-30 minutes
- Use a sponge to scrub the faucet, focusing more on the area with darker stains.
- Wipe the residue and clean the place with water.
Cleaning The Faucet Head
Most of the time, all that is required to clean the faucet head and dissolve all those calcium and mineral deposits at once is giving your faucet a bath with white vinegar. You don’t even need to take the faucet head off to carry this out.
Vinegar is one of the easily available all-natural cleaners, effective in cleaning most objects including a kitchen faucet head too! However, if your faucet is coated with a gold or bronze finish, it is better to avoid this method. White vinegar is quite a strong acid, it can degrade the hardware’s finish, turning it drab or changing its color completely.
What Materials Do You Need?
You’ll need a zipped plastic bag, vinegar, a soft cloth, and an old toothbrush for this
The Process
- Fill up a zippered plastic sandwich bag about halfway with diluted vinegar (equal parts of water and vinegar)
- Pull the vinegar bag up around the faucet so that the faucet head is completely submerged. Fasten it with a rubber band so that the bag is secured.
- Leave it there for 20-30 minutes. Remove the vinegar bag after 30 minutes to avoid damaging the finish on your faucet head.
- Using a toothbrush gives the faucet head a brush so that any bits left on it are removed.
- With clean water and a soft cloth, wipe away any remaining vinegar solution
- Finally, turn on the faucet and let hot water flow out of it.
Cleaning The Scales Off The Faucet Aerator
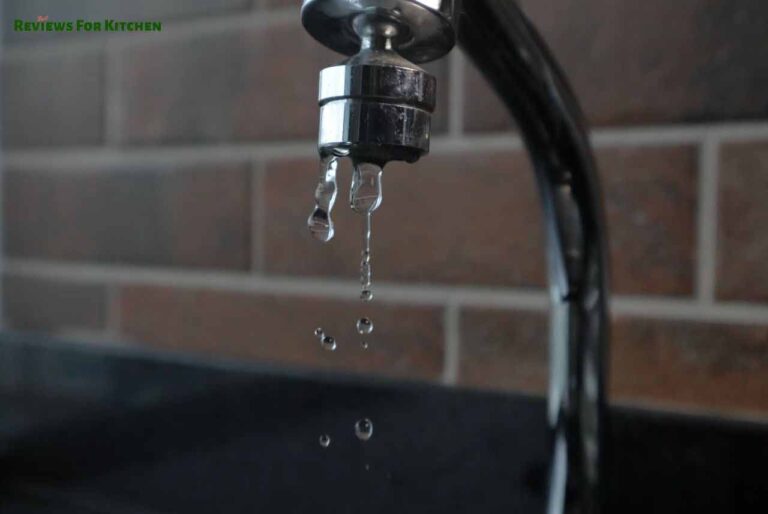
Faucet aerators, the mesh-screen piece located at the end faucets, are something that needs proper cleaning too. Mineral buildup and iron oxide residue can block the faucet screen in the aerator, causing low water pressure and an irregular flow pattern from your faucet.
If you see that water isn’t flowing from the faucet as smoothly as it once did, the aerator is probably clogged with scales and it’s time to clean up! Dipping the aerator in vinegar will help dissolve the unwanted build-ups
What Materials Do You Need?
You’ll need a bowl, a toothbrush/scrub brush, and vinegar for this.
The Process
- Begin by attempting to detach the aerator from the faucet manually. Aerators can often be both fastened and removed using hands in the same manner. However, if it seems really jammed, take the help of a wrench.
- Now soak it in vinegar for at least 30 minutes, or preferably as long as it takes for the grime to loosen up
- Clean the aerator screen to remove any last bit of dirt, you may take the help of an old toothbrush or scrub brush for it
- Clean the residue with water and finally screw the aerator back onto the faucet.
Some Tips For Cleaning the Kitchen Faucets
Cleaning your kitchen faucets is not that hard, having the necessary equipment and following the right procedure is all you need.
- Never use scouring brushes and other abrasive brushes. It may create permanent marks on the faucet. When in doubt about your scrubber, test it in a hidden spot first.
- Avoid contact between vinegar and iron. It can create permanent damage.
- Remove the faucet head if you think there are minerals or other deposits inside it. Use a toothbrush to clean inside deposits.
- If you are using bleach as a disinfectant, simply mix it with water to dilute it. You should not add any additional cleaning agent to it.
- You may use a mild glass cleaner as a cleaning agent for the faucet if you can’t find a faucet cleaner
- For faucets that have a living finish, don’t clean them with anything else except water. It can affect the natural patina of the material.
- Always remain gentle while cleaning the kitchen Faucet.
Final Verdict About Cleaning Kitchen Faucet
I have already discussed the ways and all you need to do is to prepare the solutions and wipe off the stains. Apart from this, I discussed some tips to clean it effectively.
Finally, I can say, clean the faucet more often to keep it always clean.
Before saying bye-bye I want to suggest an article about the best commercial kitchen faucet reviews. Click here to read
FAQs
How often do you need to clean faucets?
It’s a good idea to clean faucet fixtures frequently to keep them looking nice while functioning properly. At the very least, they should be cleaned once a week.
If, however, you discover that they are beginning to become greased or unclean, you should clean them immediately.
How to clean gold-toned faucets?
To clean gold-plated faucets, add a little baking soda to distilled water and make a mixture. Avoid applying pressure or using an abrasive scraping tool. Rinse, and then blot dry.
Dish soap, which is a mild cleaning agent, can also be used instead of the mixture. But it shouldn’t be applied directly to fixtures. Apply it gently to the areas that need cleaning after making a lather with a few drops of water.
How to clean bronze-coated faucets?
To clean bronze-coated faucets, one cup of white vinegar should be combined with one teaspoon of salt and flour to make a paste. Apply the paste to the bronze faucet, let it treat the spots for half an hour or so, then wash it off with warm water.
Dish soap, which is a mild cleaning agent, can also be used instead of the mixture. But it shouldn’t be applied directly to fixtures. Apply it gently to the areas that need cleaning after making a lather with a few drops of water.
How do I make my chrome faucet shine?
To make your chrome faucets shine, first, perform the basic and deep cleaning processes that I mentioned, then wipe the faucet with a cotton ball dipped in some baby oil. Alternatively, rub it gently with some toothpaste and a soft cloth. Hopefully, it will bring back the gleam like new.
Dish soap, which is a mild cleaning agent, can also be used instead of the mixture. But it shouldn’t be applied directly to fixtures. Apply it gently to the areas that need cleaning after making a lather with a few drops of water.
How do you clean faucets with toothpaste?
The same action that toothpaste uses to get rid of plaque and clean our teeth also gets rid of marks and spots from chrome faucets. You’ll just have to make sure to use a white non-gel one.
To clean your faucets with toothpaste, rub the non-gel white toothpaste in a circular motion on the faucet using a soft cloth. Then wipe it away with a dry cloth or clean it with water if necessary.
Dish soap, which is a mild cleaning agent, can also be used instead of the mixture. But it shouldn’t be applied directly to fixtures. Apply it gently to the areas that need cleaning after making a lather with a few drops of water.
Can I use baking soda to clean the faucet rust?
Yes, baking soda is a great household item to clean the faucets corroded from rust.
- Make a thick paste with equal parts of water and baking soda, you may also add a few drops of mild dishwashing agent to the paste.
- Apply the paste to the faucet and leave for a few minutes.
- Now scrub vigorously with a toothbrush or a scrub brush until you see the rust coming off.
- Finally, rinse with water and wipe with a soft cloth.
Can I leave the vinegar on the faucet overnight?
Yes, for a deep clean you can leave the vinegar-filled zipper bag overnight after tying it to the faucet. By morning, you’ll hopefully see a grime-free faucet.
However, if your faucet has a bronze, nickel, or gold finish, then it’s better not to do it.
People also search about
- Ultimate Kitchen Faucets Buying Guide | Complete Buying Guide
- How To Care for A Kitchen Faucet?
- How to Clean a Delta Pull Down Kitchen Faucet Aerator?
- How To Clean Pur Water Filter Faucet Mount?
- How to Clean Delta Kitchen Faucet Head?
- How to Remove Aerator from Moen Kitchen Faucet? Unearth the Best Tricks!