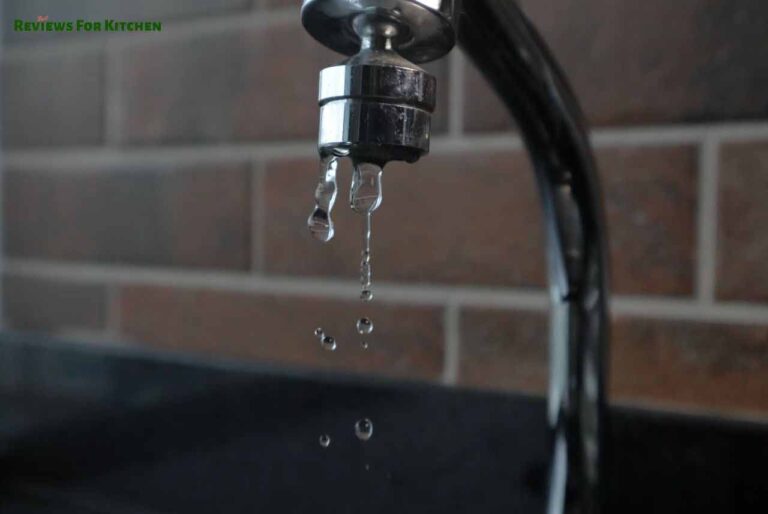
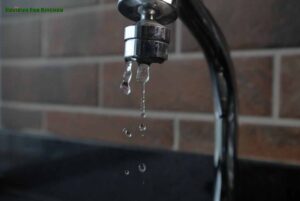
A dripping faucet wastes more than you think. A faucet that drips just once per second wastes 5 gallons of water every single day — that’s over 1,800 gallons a year, adding real money to your water bill.
The good news: you can fix it yourself without calling a plumber, even if the handle looks impossible to remove. In this guide, I’ll cover all four faucet types — cartridge, compression, ball, and ceramic disc — and specifically address the most common frustration I hear from readers: “My faucet handle won’t come off.”
Spoiler: it almost certainly can come off. You just haven’t found the hidden screw yet.
What You’ll Learn
- Why your faucet is actually leaking (the real cause, not just “it’s old”)
- How to remove a handle that looks non-removable
- Step-by-step repair instructions for all 4 faucet types
- What to do when the faucet still leaks after you fix it
- When to repair vs. when to just replace
Tools You’ll Need (for any faucet type)
Before you start, gather these. You don’t want to be mid-repair hunting for a wrench.
- Adjustable pliers or channel-lock pliers
- Set of Allen keys / hex keys (metric and imperial)
- Flathead and Phillips screwdrivers
- Needle-nose pliers
- Replacement cartridge or O-ring kit (faucet-type specific — details below)
- Silicone plumber’s grease (non-toxic, heatproof)
- Towel or small bucket (for residual water)
- Flashlight (under-sink work is dark)
Step 1: Turn Off the Water Supply First — Always
This sounds obvious, but it’s the step most DIYers skip and regret.
For a kitchen or bathroom sink faucet, look under the sink for two shut-off valves (one hot, one cold). Turn both clockwise until they stop. Then turn the faucet on briefly to release any pressure still in the line.
If you can’t find the shut-off valves under the sink, turn off the main water supply for your home. It’s usually in the basement, utility room, or outside near the foundation.
Once water is off: put a towel under the work area and keep a bucket nearby. There will be residual water in the pipes.
Step 2: Identify Your Faucet Type
Before you take anything apart, you need to know what you’re working with. Each faucet type has a different repair method.
Cartridge faucet — single or double handle, very common in modern kitchens. The handle lifts up or rotates. When you look inside after removing the handle, you’ll see a cylindrical plastic or brass cartridge. Most common type in homes built after 1990.
Compression faucet — almost always double-handled (separate hot and cold). Older style, common in homes built before 1980. You physically “compress” the handle down to stop water flow — you can feel the resistance.
Ball faucet — single handle that rotates in a ball-shaped cap. Common in American Standard and Delta single-handle kitchen faucets. The handle moves in all directions (up/down and left/right).
Ceramic disc faucet — single lever handle, moves side to side rather than up and down. Premium faucets. You’ll see a wide cylindrical body inside when you open it up.
Not sure? Look up your faucet’s brand and model number (usually on a sticker under the faucet body or on the original box). The manufacturer’s website will tell you the type.
Step 3 (The Key One): How to Remove a Handle That Looks Non-Removable
This is the section most people need. If your handle looks like it has no screws, no knobs, nothing to undo — don’t panic and don’t force it.
Modern faucet handles are almost always removable. The screws are just hidden. Here’s where to look:
Find the hidden screw
Under the decorative cap: Look at the very top of the handle. There is almost always a small decorative plastic cap — it’s usually the same colour as the handle. Pry it off gently with a flathead screwdriver or your fingernail. Underneath you’ll find a Phillips or hex screw.
On the back of the handle: Some faucets (especially quarter-turn or half-turn styles) have a set screw facing away from you — toward the wall. Turn the faucet to face you and look at the back of the handle base.
At the base of the handle: A few faucet brands (notably Moen) hide the set screw at the bottom of the handle where it meets the faucet body. You may need to feel around with your finger rather than look.
Removing the handle
Once you’ve located the screw:
- Insert the correct Allen key (most common sizes: 3/32″, 1/8″, or 5/32″ imperial; 2.5mm or 3mm metric) into the screw
- Turn counterclockwise to loosen
- Remove the screw completely and keep it somewhere safe — these are tiny and easy to lose
- Grip the handle firmly and pull straight up. If it’s stuck, wiggle gently side to side while pulling. Do not use a hammer or wrench on the handle itself — you’ll crack it.
If the handle still won’t budge: It may be mineral-deposit stuck (common in hard water areas). Apply a small amount of WD-40 or penetrating oil around the base of the handle, wait 10 minutes, then try again.
Repair Guide by Faucet Type
Now that the handle is off, here’s the specific fix for each type:
Fixing a Cartridge Faucet (Most Common)
Cartridge faucets leak when the cartridge wears out or the O-rings around it deteriorate. The fix is replacing the cartridge — you cannot repair a worn cartridge, only replace it.
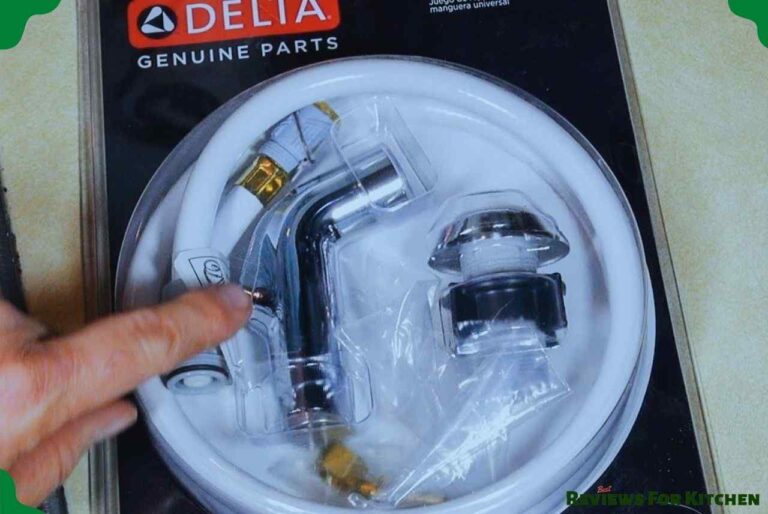
Get the right replacement cartridge first. Take a photo of the cartridge before you remove it, or take the old one to a hardware store. Moen, Delta, Kohler, and Price Pfister all use proprietary cartridges — a generic one usually won’t seal correctly.
Steps:
- With the handle removed, you’ll see a retaining clip or retaining nut holding the cartridge in place
- Use needle-nose pliers to remove the retaining clip (it lifts straight up), or use adjustable pliers to unscrew the retaining nut counterclockwise
- Grip the top of the cartridge firmly and pull straight up — wiggle gently if it resists
- Note which direction the cartridge is facing before you remove it (there are tabs on the sides that must align with slots in the faucet body)
- Inspect the old cartridge — look for cracks, worn O-rings, or mineral build-up
- Apply a thin coat of silicone plumber’s grease to the new cartridge body and its O-rings
- Insert the new cartridge in the same orientation as the old one — the tabs must click into the slots
- Replace the retaining clip or nut
- Reinstall the handle, turn on the water supply slowly, and test
Still leaking after cartridge replacement? The seat (the part the cartridge presses against inside the faucet body) may be damaged. This is rare but requires either a seat wrench to replace it or — if the faucet is old — replacing the whole faucet unit.
Fixing a Compression Faucet
Compression faucets leak from the spout when the rubber seat washer at the bottom of the stem wears out. They leak from the handle base when the O-ring on the stem deteriorates.
Steps:
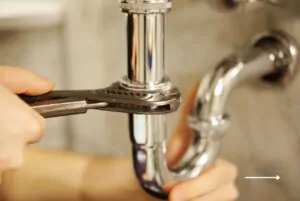
- With the handle removed, use adjustable pliers to unscrew the packing nut counterclockwise — this is the large hex nut you’ll see directly under where the handle was
- Pull the stem straight up out of the faucet body
- At the bottom of the stem, you’ll see a rubber washer held in place by a brass screw — this is almost always the culprit for spout dripping
- Remove the brass screw, take off the old washer, and replace with an identically sized new washer (take the old one to the hardware store to match it)
- While you’re here, inspect the O-ring running around the stem itself — if it looks cracked or flattened, replace it too
- Coat everything with silicone plumber’s grease
- Reinsert the stem, tighten the packing nut (firm but not over-tight — over-tightening cracks the seat), reinstall the handle
- Turn on the water and test
Pro tip: Replace both hot and cold washers at the same time. If one has worn out, the other is close behind.
Fixing a Ball Faucet
Ball faucets have more moving parts than any other type, which is why they’re more likely to develop leaks. When they leak, it’s usually the springs, inlet seats, or O-rings — rarely the ball itself.
Get a repair kit before you start. Ball faucet kits (available at hardware stores for $10–20) include all the parts you’ll need: springs, seats, O-rings, and sometimes a new ball. Buy the kit for your specific brand — Delta, Moen, and American Standard all differ.
Steps:
- Remove the handle (the set screw is usually under a decorative cap on the side of the handle)
- Using adjustable pliers, unscrew and remove the cap and collar (the rounded pieces directly under the handle)
- You’ll now see the ball mechanism — use the special cam tool from your repair kit (or needle-nose pliers) to remove the cam, cam washer, and rotating ball
- Reach inside the faucet body with needle-nose pliers and remove the two small springs and rubber seats (one for hot, one for cold)
- Cut the O-rings off the faucet body with a utility knife and replace them with the new ones from your kit (coat with silicone grease before installing)
- Install new springs and seats — the seats are cup-shaped; the rounded side goes down into the faucet
- Replace the ball (reuse the old one if it’s not scratched or damaged)
- Reassemble the cam, cam washer, cap, and collar
- Reinstall the handle, turn on water, test
Fixing a Ceramic Disc Faucet
Ceramic disc faucets are the most durable type and rarely need repair. When they do leak, it’s almost always because the ceramic discs have cracked or the rubber seals beneath them have worn out. Often, a thorough clean is all that’s needed.
Steps:
- Push the handle backward to expose the set screw, remove it, and lift off the handle
- Remove the decorative escutcheon cap (the cover plate)
- Unscrew the mounting screws holding the ceramic disc cylinder in place
- Lift out the cylinder — you’ll see two or three rubber seals (neoprene seats) at the bottom
- Pry the seals out with a flathead screwdriver
- Clean first before replacing: Soak the cylinder in white vinegar for 30–60 minutes to dissolve mineral deposits. Use a soft plastic scouring pad (not metal — you’ll scratch the ceramic) to clean the openings
- Rinse thoroughly with clean water
- If the seals are cracked or brittle, replace them with new ones (match by size at the hardware store)
- Reassemble everything in reverse order
- Important: Turn the water back on very slowly for ceramic disc faucets. Turning it on fast can crack the ceramic disc with water hammer pressure.
Faucet Still Leaking After the Repair? Try This
If you’ve replaced the cartridge, washer, or O-rings and the faucet still drips, here are the most common causes:
Wrong replacement part — The most common issue. A washer that’s 1mm too small, or a cartridge from the wrong model year, won’t seal properly. Take the old part to the hardware store and physically match it.
Damaged valve seat — The valve seat is the part inside the faucet body that the cartridge or washer presses against. If it’s corroded or pitted, even a perfect new washer won’t seal. You need a seat wrench to replace it, or at this point, replacing the whole faucet is often more cost-effective.
Over-tightened packing nut — If the faucet is hard to turn and still leaks, the packing nut is too tight and has deformed the washer. Slightly loosen the packing nut (just a quarter turn) and test again.
Water pressure too high — Household water pressure should be 40–80 PSI. Above 80 PSI, faucets and valves wear out faster and leak even when new. You can buy a pressure gauge at any hardware store (attaches to an outdoor hose bib) for under $15. If pressure is too high, a plumber can install a pressure-reducing valve.
When to Repair vs. Replace the Whole Faucet
Not every leaky faucet is worth fixing. Here’s when to repair, and when to just replace:
Repair if:
- The faucet is less than 10 years old
- It’s a quality brand (Moen, Delta, Kohler, Price Pfister)
- The repair part costs less than 30% of a new faucet’s price
- You can find replacement parts (some discontinued models can’t be repaired)
Replace if:
- The faucet is 15+ years old
- It’s a cheap no-name brand where parts aren’t available
- The faucet body itself is cracked or corroded
- You’ve repaired it twice already and it’s leaking again
- You’re remodelling anyway — a new faucet transforms the look of a kitchen
Frequently Asked Questions
For a cartridge or compression faucet, most people complete the repair in 30–60 minutes, including parts runs. A ball faucet takes 60–90 minutes if it’s your first time.
No — cartridge replacement is one of the most beginner-friendly plumbing tasks. As long as you can turn off the water supply and follow the steps above, you can do this yourself.
This almost always points to a worn washer or cartridge. The seal that should stop water flow is no longer doing its job fully. The fix is replacement of the relevant part as described above.
The stem has stripped — the threads that let the stem compress the washer have worn down. This is common in older compression faucets. The stem itself needs replacing.
One drip per second = approx. 5 gallons/day = 1,800+ gallons/year. At average US water rates, that’s $8–15/year per dripping faucet. It adds up quickly if multiple faucets are dripping.
No — plumber’s putty is for sealing drain fittings, not internal faucet parts. Use only silicone-based plumber’s grease for cartridges, O-rings, and washers. Non-silicone lubricants degrade rubber parts.
Quick Reference: Which Part Causes Which Leak
| Where It’s Leaking | Most Likely Cause | Fix |
|---|---|---|
| From the spout (dripping) | Worn washer or cartridge | Replace washer / cartridge |
| From the base of the handle | Worn O-ring on stem | Replace O-ring |
| Around the base of the faucet | Worn O-ring on body | Replace body O-ring |
| Under the sink / supply lines | Loose supply line connection | Tighten or replace supply line |
| From the sprayer hose | Cracked hose or worn connector | Replace sprayer hose |
If this guide helped you fix your faucet, leave a comment below — tell us which faucet type you have and how the repair went. Your experience helps other readers facing the same problem.
People also search for
- Ultimate Kitchen Faucets Buying Guide | Complete Buying Guide
- How to Fix a Leaking Kitchen Faucet in a Proper Way
- How To Remove A Stuck Faucet Stem?
- How To Connect Two Faucet Supply Lines Together? – Plumbing Solution
- How to Replace Delta Kitchen Faucet Sprayer Hose? – Real Solution!
- How to Remove Slotted Cleanout Plug: Tools and Techniques
- How to replace a Kitchen Faucet | Replace it within an hour
- Why Is The Water In My Faucets Brown And Cloudy?
- How to Repair Low Pressure in A Kitchen Faucet?