My grandmother had the same kitchen faucet for over twenty years. Chrome, two handles, nothing fancy — but it looked almost as good the day she moved out as it did when it was installed. I asked her once what her secret was. She looked at me like I’d asked something deeply obvious and said: “I just wipe it down every day after I do the dishes.”
That’s it. That was her whole routine. And it worked.
Knowing how to care for a kitchen faucet properly isn’t complicated — but most people either do too little (wiping it once in a blue moon) or too much (using harsh cleaners that strip the finish and cause more damage than the water spots ever did). The right approach sits somewhere in the middle, and once you’ve got a simple routine down, your faucet will stay looking clean and working smoothly for years longer than it would otherwise.
In this guide, I’ll walk you through daily habits, weekly upkeep, deep cleaning techniques, finish-specific care, and how to spot early problems before they turn into repair bills. Whether you’ve got a basic chrome faucet or a high-end brushed nickel fixture, there’s something here that’ll help.
Quick Takeaways Before You Start
- A 30-second daily wipe-down prevents the majority of buildup that causes long-term finish damage
- Water spots and soap scum are the most common faucet problems — both are easy to prevent and remove
- Different finishes (chrome, brushed nickel, oil-rubbed bronze, matte black) need different cleaning approaches
- Avoid abrasive cleaners, bleach, and acidic products like vinegar on most modern faucet finishes
- The aerator is the most overlooked part of faucet care — a clogged aerator affects water pressure and flow
- Most faucet problems — drips, low pressure, mineral buildup — are preventable with regular maintenance
Why Faucet Care Matters More Than You Might Think
Here’s the thing most people don’t realize: the finish on a kitchen faucet isn’t just decorative. It’s a protective layer over the base metal — usually brass or zinc alloy — that prevents corrosion, resists mineral deposits, and keeps the whole fixture functioning properly. When that finish gets damaged, you’re not just dealing with an aesthetic problem. You’re looking at accelerated deterioration of the faucet itself.
What’s Actually Attacking Your Faucet Every Day
Your kitchen faucet takes a lot of daily abuse that most people never think about. Hard water — which contains dissolved minerals like calcium and magnesium — leaves deposits every single time water touches the surface and evaporates. According to the U.S. Geological Survey’s water hardness data, roughly 85% of U.S. homes have hard water to some degree. If you live in Phoenix, Las Vegas, Dallas, or most of the Midwest and Southwest, your water is doing real work on your faucet every day.
Soap scum from dish soap and hand soap bonds to the finish and creates a film that traps more minerals and grime over time. Food splashes — especially acidic ones like lemon juice, tomato, or vinegar — can etch certain finishes if left to sit. And the steam and heat from cooking right next to the sink accelerates all of it.
The Cost of Ignoring It
I used to completely ignore my faucet beyond a vague wipe when it looked bad. Then the aerator on my old Moen faucet got so clogged with mineral deposits that the water pressure dropped to a trickle, and I had to replace the whole aerator assembly. Then the handle started dripping because a worn O-ring that probably would have lasted longer with occasional lubrication gave out entirely. None of it was expensive individually — but collectively, it was all preventable with ten minutes a week.
A well-maintained faucet lasts 15-20 years. A neglected one often starts showing serious problems within 5-8 years, even if it’s a quality brand. That gap is almost entirely down to maintenance.
Hard Water vs. Soft Water: Does It Change Your Approach?
Yes, meaningfully. If you have hard water (and most of us do), mineral deposits are your primary enemy — you need to be more vigilant about drying the faucet after use and doing periodic deep cleans to dissolve buildup before it hardens. If you have soft water or a water softener installed, your main concerns shift to soap residue and normal grime. Same general care routine, but different priorities in terms of where to focus your attention.
The Daily and Weekly Habits That Keep a Faucet Looking New
Honestly, this section contains the most impactful advice in the entire guide. The fancy deep-cleaning techniques matter — but they matter a lot less if you’ve built up the simple daily habits that prevent the serious buildup from occurring in the first place.
The Daily Wipe: 30 Seconds That Changes Everything
After doing dishes or the last time you use the kitchen sink for the day, take a soft cloth or a dry paper towel and wipe the faucet body, handles, and base dry. Seriously — just wipe the water off. That’s it.
This single habit prevents the mineral deposits that water leaves behind as it evaporates. It prevents soap scum from bonding to the surface. And it takes about 30 seconds. My grandmother’s secret, explained in full.
For this to work, the cloth needs to be soft — microfiber cloths are ideal because they lift moisture without scratching. Keep one folded next to the sink and you’ll actually use it.
Weekly Light Cleaning
Once a week, a slightly more thorough wipe-down keeps everything in good shape between deeper cleans. Here’s the routine:
- Dampen a soft microfiber cloth with warm water
- Add a tiny drop of mild dish soap — seriously, just a drop
- Wipe down the entire faucet: body, handles, base, spout
- Rinse the cloth thoroughly, then wipe off all the soap residue
- Dry completely with a second clean cloth
That’s your whole weekly routine. Five minutes, no special products needed. The key is rinsing off all the soap — soap residue left on a faucet actually attracts more grime and can dull certain finishes over time if it’s never fully removed.
What to Actually Use (And What to Avoid)
The cleaning product aisle is full of things that will damage your faucet finish faster than hard water ever would. Here’s a clear breakdown:
| Product | Safe for Most Finishes? | Notes |
|---|---|---|
| Mild dish soap + warm water | ✅ Yes | Best everyday cleaner for all finishes |
| Microfiber cloth (dry) | ✅ Yes | Ideal for daily wipe-downs |
| White vinegar (diluted) | ⚠️ Chrome only | Never use on brushed nickel, oil-rubbed bronze, or matte black |
| Lemon juice | ⚠️ Chrome only, briefly | Acidic — rinse immediately, don’t let sit |
| Bleach or bleach-based cleaners | ❌ No | Damages all faucet finishes over time |
| Abrasive scrubbers or steel wool | ❌ No | Scratches all finishes permanently |
| Bathroom tile cleaners / CLR | ❌ No | Too harsh for faucet finishes — will strip PVD coatings |
| Windex / glass cleaner | ⚠️ Chrome only | Ammonia content can damage specialty finishes |
Finish-Specific Care: Chrome, Brushed Nickel, Oil-Rubbed Bronze, and Matte Black
This is where a lot of well-intentioned faucet care goes wrong. People look up “how to remove water spots from a faucet,” find a tip about vinegar and water, try it on their brushed nickel faucet — and end up with a patchy, damaged finish that can’t be restored. Different finishes have genuinely different chemical tolerances. Knowing which one you have is step one.
Chrome Faucets: The Most Forgiving Finish
Chrome is the classic, shiny silver finish — and it’s the most durable and forgiving of all the common faucet finishes. It’s a hard electroplated coating that resists most mild cleaners and can handle diluted vinegar for mineral deposit removal without issues.
Care approach for chrome:
- Daily wiping is highly effective at keeping chrome spot-free
- For water spots and mineral deposits: a 50/50 solution of white vinegar and water on a cloth, left for 5-10 minutes, then wiped and rinsed thoroughly
- For stubborn spots: a paste of baking soda and water applied gently with a soft cloth, then rinsed completely
- Polish occasionally with a dry microfiber cloth for shine — the friction alone brings up the sheen nicely
Chrome is also the easiest finish to spot early damage on — if you see dull patches, pitting, or rust spots starting, address them quickly before they spread. Our deeper guide on how to clean a chrome kitchen faucet without scratching covers the technique in detail for anyone dealing with stubborn buildup.
Brushed Nickel: Beautiful but Needs Gentler Care
Brushed nickel has that warm, slightly matte silver look that’s become incredibly popular in kitchen design. The finish is created by brushing the metal in one direction to create fine lines — and those lines are exactly what makes harsh cleaners problematic. Abrasive products and acidic solutions can disrupt those brush marks and create visible uneven patches that can’t be fixed without refinishing.
For brushed nickel, mild dish soap and warm water is genuinely all you need for regular care. For mineral deposits that won’t come off with soap, use a product specifically labeled as safe for brushed nickel — several brands make finish-safe mineral deposit removers. Skip vinegar entirely. And always wipe with the brush direction, not against it, to avoid dulling the finish pattern.
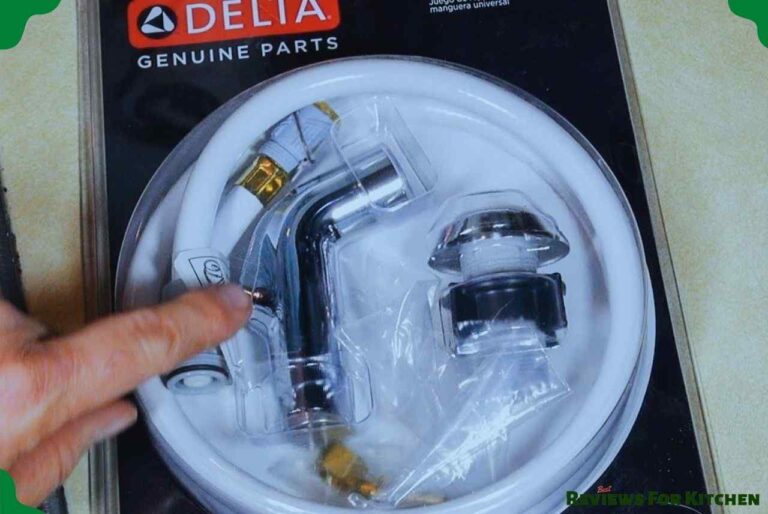
If you have a Delta brushed nickel faucet specifically, our post on how to clean a Delta kitchen faucet head covers the brand-specific approach that won’t damage the finish.
Oil-Rubbed Bronze: The High-Maintenance Beauty
Oil-rubbed bronze has a dark, warm, antique-looking finish that ages deliberately — it’s designed to develop patina over time, and that patina is part of the appeal. This also means it’s the most sensitive finish when it comes to cleaning.
Water spots show dramatically on oil-rubbed bronze, which makes the daily wipe-down even more important than for other finishes. For cleaning, use only warm water and a very small amount of mild soap. Dry immediately and thoroughly after every use. Avoid any acidic cleaners, mineral deposit removers, or abrasives — these strip the living finish and create permanent light patches that look terrible against the dark background.
Some oil-rubbed bronze faucets benefit from a very occasional application of a carnauba-based wax to protect the finish and deepen the color. Check your faucet manufacturer’s care guide before trying this — not all oil-rubbed bronze finishes respond the same way.
Matte Black: The Newest Finish, the Strictest Care
Matte black faucets are striking and modern — and they show fingerprints, water spots, and soap residue more obviously than almost any other finish. They also tend to have PVD (physical vapor deposition) coatings that are genuinely durable but will visibly degrade if exposed to harsh chemicals.
The care approach is simple but must be followed consistently: warm water and mild soap only, dry immediately after every use, and never use any cleaning sprays, vinegar, bleach, or abrasive products. A dry microfiber wipe after every use is almost mandatory with matte black to prevent water spots from becoming permanent. The good news is that properly maintained matte black holds up well — the strict care routine really does keep it looking sharp.
Deep Cleaning the Parts Most People Forget: Aerator, Base, and Handles
The visible faucet body gets most of the attention during cleaning. But the parts that actually affect how the faucet works — and that accumulate the most serious buildup over time — are the ones you can’t easily see: the aerator, the handle bases, and the connections at the sink deck.
The Aerator: The Most Important Part to Maintain
The aerator is the small screen fitting at the tip of the faucet spout. It mixes air into the water stream to create a smooth, non-splashing flow — and it’s the most common place for mineral deposits to accumulate and restrict water pressure over time.
Every 3-6 months, unscrew the aerator (hand-tight counterclockwise, or use pliers with a cloth to protect the finish if it’s stuck) and inspect it. If the screen looks white, crusty, or clogged with mineral buildup, soak it in white vinegar for 20-30 minutes, then scrub gently with an old toothbrush and rinse thoroughly. If you have a Delta pull-down faucet, the aerator cleaning process has a few specific steps — our full walkthrough on how to clean a Delta pull-down kitchen faucet aerator covers exactly what to do.
If you’d rather not remove the aerator at all, there’s a technique that works surprisingly well — our future guide on how to clean a kitchen faucet aerator without removing it will walk you through the plastic bag vinegar soak method that works for most faucets.
The Handle Bases: Where Grime Hides
The junction where the handle meets the faucet body, and where the faucet body meets the sink deck, are grime traps. Water, soap, food particles, and mineral deposits all collect in these tight spaces and can build up into a thick crust if ignored. Plus, moisture sitting in these gaps can eventually work its way under the faucet base and cause staining on the sink surface or countertop.
Once a month, take an old toothbrush or a small soft-bristle detailing brush, dip it in your mild soap solution, and work it into all the crevices around the handles and base. A cotton swab works well for very tight spots. Rinse the soap out thoroughly with a damp cloth, then dry completely.
If You Have a Filtered Faucet or Faucet Mount
If you’ve got a water filter mounted to the faucet — like a PUR or Brita faucet mount filter — the filter housing itself needs regular attention too. Mineral deposits and mold can build up in and around the filter housing, affecting both water quality and flow rate. Our dedicated post on how to clean a PUR water filter faucet mount covers the full cleaning process for those units, including how often to do it based on your water hardness.
How to Protect the Finish Long-Term (Prevention Is Easier Than Repair)
Once you’ve got the cleaning routine down, there are a few additional steps that give your faucet finish meaningful long-term protection — reducing how often you need to deep clean and extending the life of the finish significantly.
Waxing for Finish Protection
This sounds more intensive than it is. A very thin application of carnauba wax (the same stuff used on cars) applied to a clean, dry faucet every few months creates a hydrophobic barrier that causes water to bead up and run off rather than sitting and evaporating to leave mineral deposits. It also adds a subtle shine and makes the surface easier to wipe clean.
Use a tiny amount on a soft cloth, buff gently over the faucet surface, let it haze slightly (30 seconds), then buff to a shine with a clean cloth. The whole process takes about 3 minutes and the protection it provides is genuinely worth the effort. This works especially well on chrome and stainless finishes — check your manufacturer guidance for brushed nickel and specialty finishes before applying.
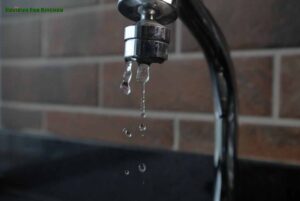
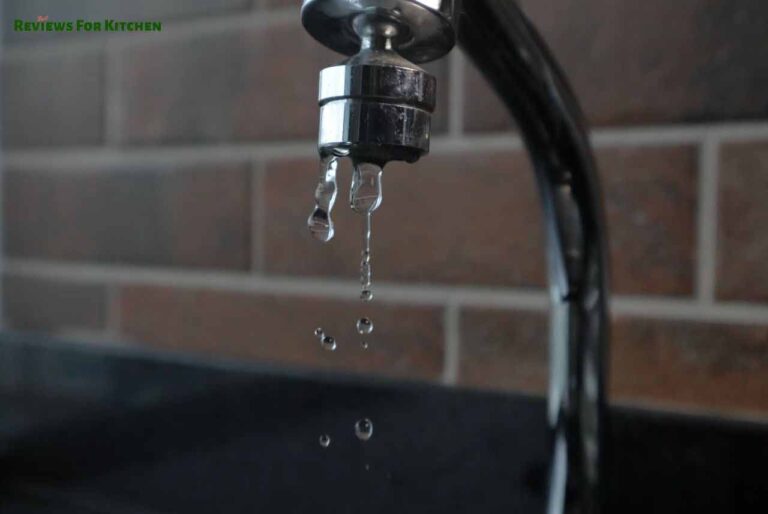
Address Water Spots Before They Harden
Fresh water spots — the kind that appeared in the last day or two — wipe off with almost no effort. Water spots that have been sitting for weeks or months have had time to mineralize and bond chemically to the finish surface. They’re much harder to remove and often require acidic cleaners that you’d rather not use at all.
This is the practical reason the daily wipe-down matters so much. It’s not about cleanliness for its own sake — it’s about catching deposits before they harden into something that requires aggressive treatment. Our guide on how to remove hard water stains from a kitchen faucet naturally covers what to do when deposits have already hardened, but prevention is always the better path.
Watch for Early Warning Signs
Part of caring for a kitchen faucet well is paying attention to how it’s actually performing — not just how it looks. These are the signs worth acting on quickly:
- Reduced water pressure from the spout: Almost always a clogged aerator — clean it before the restriction gets worse
- Handle stiffness or grinding sensation: Mineral buildup in the cartridge or valve — can often be resolved with a cartridge cleaning before a full replacement is needed
- Dripping when fully off: Worn O-ring or cartridge seal — easier and cheaper to fix early than after the drip has been running for months
- Water pooling at the base: Could indicate a loose connection or worn gasket under the sink — worth checking before moisture damage occurs
None of these require a plumber to diagnose initially. A quick look and a basic cleaning often resolves the early-stage versions of all of them. For a thorough approach to the cleaning side of faucet maintenance, our complete guide on how to clean a kitchen faucet covers the full process from routine surface cleaning all the way through deep cleaning each component.
Common Faucet Care Mistakes That Quietly Cause Damage
Let me be real with you: most faucet finish damage isn’t from neglect — it’s from well-intentioned cleaning done with the wrong products or technique. These are the mistakes I see most often, and they’re all easy to avoid once you know about them.
Using Vinegar on the Wrong Finish
White vinegar is great for removing mineral deposits from chrome. It’s actively harmful to brushed nickel, oil-rubbed bronze, matte black, and most specialty PVD finishes. The acid in vinegar can strip the protective coating and create permanent dull patches or discoloration. Before using any acidic cleaner — even a “natural” one — confirm it’s safe for your specific finish. When in doubt, check your faucet brand’s website for their official care recommendations.
Scrubbing With Anything Abrasive
Scouring pads, green scrubby sponges, paper towels with a rough texture, even some “soft” scrub-type cleaners — all of these can microscopically scratch faucet finishes, especially specialty coatings. Scratched finishes don’t just look dull — they lose some of their corrosion resistance, and mineral deposits get into the scratches and bond more stubbornly. Microfiber cloths and soft sponges only. Full stop.
Leaving Cleaning Products on Too Long
Spray cleaners, even ones labeled as safe for faucets, should never just sit on the finish. Apply, wipe, rinse — that’s the sequence. Products left to dry on a faucet surface can leave residue, streak, or in the case of anything with acids or harsh surfactants, start to affect the finish over time. If you use a spray product for cleaning, always follow up with a clean damp cloth to remove all residue, then dry.
Ignoring the Aerator for Years
I’ve spoken to people who had never once cleaned or checked their faucet aerator — some for 5-10 years of ownership. Heavily mineralized aerators don’t just reduce water pressure: they can affect the spray pattern, make the faucet run louder, and in extreme cases, allow mineral deposits to break loose and clog downstream pipes. A 10-minute aerator cleaning every 3-6 months is genuinely one of the highest-return maintenance tasks for any kitchen faucet.
Frequently Asked Questions
How often should I clean my kitchen faucet?
A quick 30-second dry wipe-down daily makes the biggest difference. Do a more thorough soap-and-water cleaning weekly. Deep clean the aerator every 3-6 months. If you have hard water, consider a light vinegar treatment (on chrome only) monthly to prevent mineral buildup from hardening.
What’s the best way to remove water spots from a kitchen faucet?
For chrome: a 50/50 white vinegar and water solution on a cloth, left 5-10 minutes, then wiped and rinsed. For brushed nickel and specialty finishes: use a finish-safe mineral deposit remover or a paste of baking soda and water — never vinegar. Always dry thoroughly after treating water spots to prevent new ones forming immediately.
Can I use bleach to clean my kitchen faucet?
No. Bleach damages virtually all kitchen faucet finishes over time — including chrome. It’s too harsh for the protective coatings on most modern faucets and can cause discoloration and accelerated deterioration. Mild dish soap and warm water handles the vast majority of kitchen faucet cleaning needs safely and effectively.
How do I know if my faucet aerator needs cleaning?
The clearest sign is reduced water pressure or a distorted spray pattern from the spout. You might also notice water splashing more than usual, or the stream appearing irregular or uneven. Unscrew the aerator and hold it up to a light — if the screen looks clogged or crusty white with mineral deposits, it’s past due for cleaning.
Is it okay to use vinegar on a brushed nickel faucet?
No — vinegar is acidic enough to damage brushed nickel’s protective finish, potentially causing permanent dull patches or stripping the coating unevenly. Use only mild soap and warm water on brushed nickel. For stubborn mineral deposits, look for a cleaner specifically labeled as safe for brushed nickel finishes.
How do I keep my black matte faucet from showing water spots?
Dry it after every single use — this is non-negotiable with matte black. A dry microfiber cloth takes 20 seconds and prevents the mineral deposits that show so dramatically on dark matte surfaces. Applying a thin coat of carnauba wax every few months creates a protective barrier that causes water to bead off rather than sit and evaporate.
A Little Attention Goes a Long Way With Kitchen Faucets
Caring for a kitchen faucet well comes down to two things: staying consistent with simple daily and weekly habits, and knowing which products and techniques are safe for your specific finish. The 30-second daily wipe-down really is as impactful as it sounds. Combined with a weekly soap cleaning, a quarterly aerator check, and the occasional deeper treatment when needed — that’s the entire system.
You don’t need specialty products for most of this. You don’t need a lot of time. You just need to build the habit and stick to it.
Start today with the daily wipe-down and see how much of a difference it makes over the next few weeks. And if you want to go deeper on any specific cleaning challenge, our posts on how to clean a kitchen faucet thoroughly and the finish-specific care guides linked throughout this post will take you the rest of the way.
Got a faucet finish question or a stubborn water spot situation I didn’t cover? Drop it in the comments — happy to help you figure it out.
People Also Search About
- Ultimate Kitchen Faucets Buying Guide | Complete Buying Guide
- How to Clean Kitchen Faucet – Basic and Deep Cleaning Process
- How to Clean a Delta Pull Down Kitchen Faucet Aerator?
- How To Clean Pur Water Filter Faucet Mount?
- How to Clean Delta Kitchen Faucet Head?
- How to Remove Aerator from Moen Kitchen Faucet? Unearth the Best Tricks!