
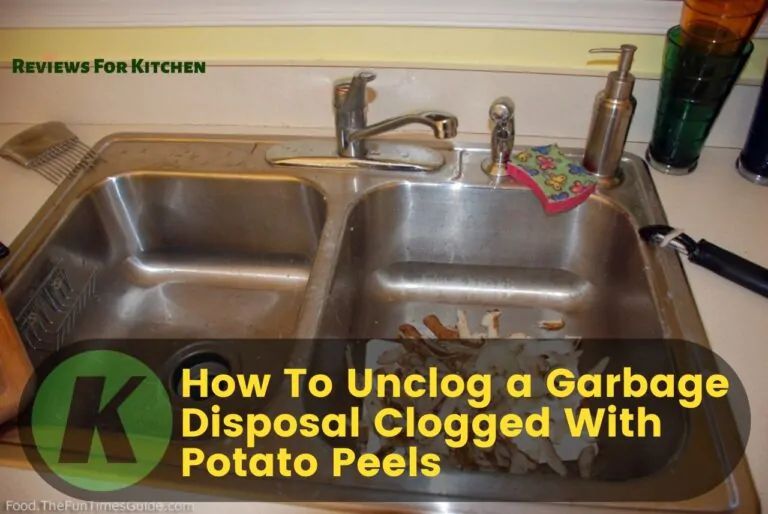

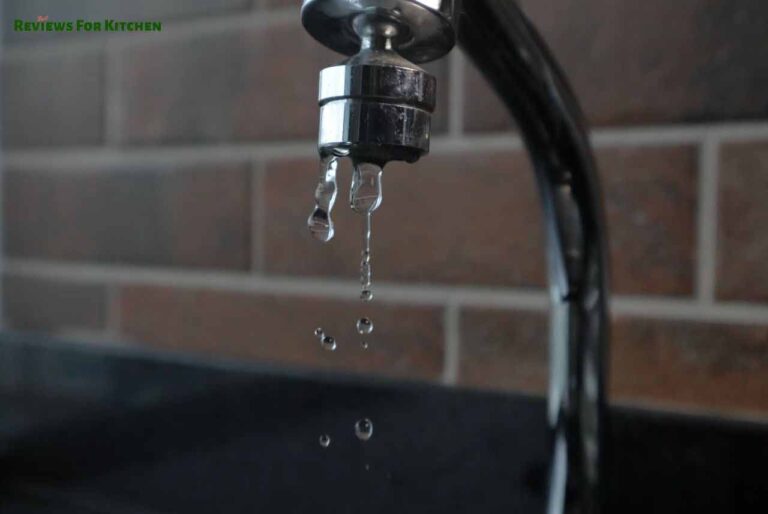
Having a clogged garbage disposal means that you won’t be able to dispose of the food waste. It also means that the undisposed food waste will just make the trash bags heavier or even spread a bad smell around the kitchen.(How to unclog a garbage disposal clogged with potato peels)
There are some certain things you should never throw in the garbage disposal. Potato peels are the worst in this list. Well, what’s done is done. Now we have to figure out the solution.
Unclogging a garbage disposal is even easier than unclogging the kitchen sink pipe. That is, of course, if you follow the right steps. This is where we come in. We will show you the easiest way to unclog garbage disposal. These steps are not limited to clogging caused by potato peels, though.
How to unclog a garbage disposal
Cost:
You can successfully unclog your garbage disposal with materials that cost around 8 to 10 bucks. We will be using household items so you might not have to spend any money at all. No need to call any plumber or electricians.
Time:
We will be following two methods to unclog the garbage disposal. The first one will require 20 minutes and the second one will require 5 to 10 minutes. If the first one works, you don’t have to follow the second one.
Now let’s take a quick look at what the materials we will need in order to unclog the garbage disposal:
- Baking soda.
- Carbonated beverages such as Pepsi or Coca cola.
- An allen wrench.
If you already have all of these as we assume, you are good to go. If vinegar and baking soda solution works, then you won’t have to use the allen wrench. And, you should use carbonated beverages only if you don’t have vinegar and baking soda. So, without wasting any more time, let’s jump right in.
In this context, you will get to know about the required tools and the deletion process. Let’s dive into the topic.
Step 1 - preparing
There is not much you have to keep in mind before starting but it’s always good to be cautious. You can wear gloves if you want because baking soda and vinegar are acidic.
Clean the garbage drain pipe thoroughly so that the solutions we will use later on can go down the pipe easily. Remove all the water from the kitchen sink. Now let’s move to the next step.
Step 2 - dissolving the potato peels
The best way to remove the potato peels is to break them down to micro bits so that the water can remove them effortlessly. To do this, you have to pour a certain amount of baking soda and vinegar into the garbage disposal drain pipe. Remember that pouring random amounts of these things won’t get you good results.
First, take a quarter cup of baking soda. It does not matter which type of baking soda you have. They work all the same in this case. Now pour the quarter cup of baking soda down the drain pipe. Turn on the garbage disposal for a few seconds. This lets the baking soda mix with the potato peels. Now wait for approximately 15 minutes before. The longer you wait the more the succession rate.
After waiting for 15 minutes, pour 1 cup of vinegar down the drain pipe. Turn on the garbage disposal again for a few seconds so that the vinegar and baking soda can effectively dissolve the potato peels. Now wait for another 5 or 10 minutes before moving on.
Remember that if you don’t have vinegar and baking soda, you can pour down pepsi or coca cola. Although they do not have the same amount of phosphoric acid, it gets the job done.
Step 3 - clearing out the starches
Once the vinegar and baking soda finishes their job, they will leave a lot of starches behind. The dissolved potato peels won’t just disappear. They will leave behind starches as well.
This is the final boss we will have to face (if everything goes well). Turn on the stove top and boil a few jugs of water. Once the water is boiling hot, slowly pour it down the drain pipe as you did in step 2. The boiling water will help clear out the starches. Now you have a clean and ready-to-go garbage disposal.
The garbage disposal is still clogged? No worries because we have another solution for you.
Step 4 - preparing again
Although the first three steps should clear out the garbage disposal, sometimes you need to bring out the big gun at the end. Using this method will only require a few minutes. So now you might be wondering why we didn’t use this method in the first place? This is because some people do not want to get technical while unclogging their garbage disposal. That is why they just call the electrician or the plumber instead.
Now let’s get back to unclogging. To prepare your garbage disposal for the next method, you have to turn off your garbage disposal completely. This means cutting off the power from the main source of electricity.
Step 5 - using the allen wrench
When you look underneath your garbage disposal, you will find a hole in the center. Almost every garbage disposal has it. If yours does not have one, sorry, you gotta call the plumber. But if you have one, take an allen wrench and put it inside. Make sure that the wrench fits snuggly.
Now gently move the allen wrench back and forth. Don’t put too much pressure. Soon you will be able to rotate the wrench without any effort. Rotate the wrench clockwise for like 10 or 15 times. Doing this will force the blades inside the garbage disposal to manually rotate. Once you are done rotating, take out the wrench.
You can do another thing to guarantee your success, which is using a wooden spoon or stick. Just take the wooden spoon and insert it inside the disposal chamber to dislodge whatever that is stuck inside. Now we are almost at the end.
Step 6 - resetting the garbage disposal
After you are done using the wrench, turn on the electrical switch that connects to the garbage disposal, but do not start the disposal immediately.
You will see a button located near the hole which you previously inserted the wrench in. It is typically a red button but it can be black as well. After turning the power back on, you should be able to press the button. If you are unable to push the button up, you have to call an electrician because the junction box may be malfunctioning or something like that.
Once you have pushed the reset button, you should be all good to go. Now run tap water down the drain and quickly turn on and off the garbage disposal to spin the flywheel. The water should rinse out all the remaining potato peels and your garbage disposal should be working fine again.
If the above mentioned methods do not work, we are sorry, it is time to replace or repair the garbage disposal.
Things you should not put down the garbage disposal
If you made the mistake of putting potato peels down your garbage disposal, chances are, you don’t have a clear idea about what to not put down the garbage disposal. Here is a short list of things you should completely avoid.
- Coffee grounds: some folks may suggest you to put coffee grounds down the disposal to keep the bad odor at bay but it can cause more problems than solving. The dense, thick pasty wad it turns to can clog the garbage disposal over time.
- Bones: never ever put bones down the garbage disposal because they are simply not made to grind hard items. While a few small bones are fine, do not put down a rack of bones.
- Oatmeal: it is common for people to put their uneaten oatmeal breakfast down the drain but as they are sticky, most likely they will clog the garbage disposal. Uncooked oatmeal is even worse.
- Onion skins: the chopped down onions are fine but when you put down the thin onion skins, they are likely to miss the blades and end up in the drain.
- Potato peels: well, we don’t have to say anything. This is the very reason you read our article.
Final verdict
Garbage disposals have been a massive help to people around the globe. They provide a quick and efficient way to dispose of uneaten or wasted food. Not just that, they make the trashbags lighter and keep the pressure off landfills.
Garbage disposals are constructed to withstand years and years of grinding, but even the toughest of machines need “oiling” sometimes. Remember that they are powerful, not invincible.
Although we have provided a step-by-step guide on how to unclog a garbage disposal clogged by potato peels, you should be very careful of what to put down the drain. You know, prevention is better than cure. It is not just about clogging, though. The more unclogged your garbage disposal remains, the longer the lifespan.
People also search
- Ultimate Kitchen Faucets Buying Guide | Complete Buying Guide
- How to Fix a Leaky Faucet with a Non-Removable Handle (All 4 Faucet Types — Step-by-Step)
- How To Unclog A Garbage Disposal Clogged With Potato Peels?
- How to Repair Low Pressure in A Kitchen Faucet?
- Why Is The Water In My Faucets Brown And Cloudy? – Plumbing Solution


4 Responses
Thank you so much! My garbage disposal could not handle the Thanksgiving mashed potato peels & my sink would not drain no matter how much plunging I did. I happen to have a bottle of toxic drano but before pouring it in my drain I decided to Google first. This blog was the first thing I read. I used a pitcher then a plastic cup to remove all the water then poured the baking soda in, turned on the disposal & checked 15 minutes later & Viola! The baking soda worked like a charm!
Thank you very much, Laurel. We are very happy to hear this, We always try to provide and our main goal is to provide proper guidelines to solve real-life experienced solutions. Again thank you for your honest feedback.
Thank you, thank you, thank you!!!!!! Why I put the potato skins down the garburator to begin with I have no idea. I had to do the baking soda, vinegar method three times and using a plunger every time as well and it finally cleared the drain while I was using the plunger like a mad woman!!. I hate to give up on things and I am glad I didn’t. Your directions were very clear and precise and I can’t thank you enough.
You are most welcome Sarah and very much appreciate your feedback. We will love to know if you have any requests about what we can add to our blog.