How To Clean Range Hood Mesh Filter | A Step-by-Step Guide

How To Clean Range Hood Mesh Filter

Regular cleaning makes a kitchen range hood prolonged and increases its performance. Besides, a clean hood motor can amazingly improve the air circulation through the kitchen. But how to clean the range hood fan motor effectively?

Range hood motor consists of two main parts. One is the fan blades and another is the motor. The best practice is to use warm soapy water for cleaning fan blades. Using a degreaser spray is best for motor cleaning since soaking the motor is prohibited.

In this guide, we will explain how to clean the inside of a range hood. If you’re thinking of doing so yourself, then let’s start!

Most home cooks, like you, don’t know exactly when to show love to their kitchen hood’s mesh filters with a thorough, simple, or deep cleaning.

And that’s why they frequently ask this question to their neighbours, relatives and friends when they clean.

However, the best part is…

Before we delve deeper into the cleaning process… Here’s 5 signs how you can understand when your mesh filter needs cleaning.

The Grease-y Aura

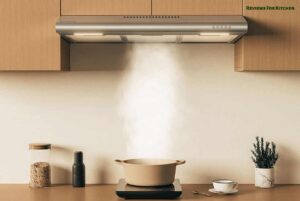
The mesh filter of the hood is like a guardian for your kitchen’s fresh air. If you find greasy villains threaten to linger even after one hour of cooking.

It indicates the mesh filter, the superhero of the hood, loses its power and is overwhelmed with grease.

So, they become less effective in neutralizing smoke and odor. And this greasy aura hijacks your kitchen’s atmosphere.

The Dim Lights Indicator

Do you feel your kitchen lights aren’t as brightly shining as they were?

It’s because, over time, your cooking grease and grime clogged the lights. And as they work like gatekeepers to offer radiant lighting in your kitchen.

Once they are clogged, the light’s brightness gets dimmed. You can also consider it as the curtains drawn on your kitchen’s brilliance.

So, open those curtains and return to the lights shining brightness. They need cleaning love.

The Muffled Whispers

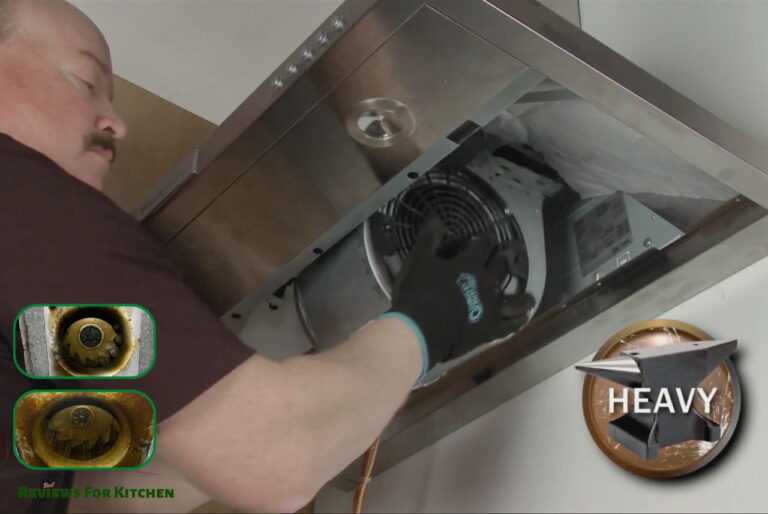
Have you noticed a roaring noise like a mighty lion from the range hood during cooking?

They ask for your attention and admiration and need some TLC as the buildup debris restricts the airflow. So the hood needs to work harder than before.

That whispering sound tells you to clean the mesh filters to restore its vocal cords.

The Grease Art Exhibition

Closely admire your kitchen walls taking a moment.

No, we don’t tell you to see the beautiful artwork you’ve hung up. Instead, we want you to look at the unintentional “grease art” that might be decorating your space.

Can you see it?

Yes…

And it’s because of the negligence of your mesh filter for a long time. So they can’t any more catch the grease particles you produce during cooking.

That’s why these make unsightly splatters on your kitchen walls and cabinets.

Not to look at this greasy gallery anymore; put on your cleaning apron and clean the mesh filters. And save your beautiful kitchen walls from the unwanted modern art masterpiece. 😁

The Sticky Fingers

Love fun, even in the kitchen. Then, here’s a fun experiment to know the mesh filter cleaning time.

Lightly touch the hood’s mesh filters with your fingertips.

Do you feel sticky or greasy?

Then, it’s a sign they are deprived of a good scrub for a long time and become a sticky trap.

To change the greasy game of your mesh filters, they need an immediately squeaky-clean makeover.

Step By Step Guide to Clean Range Hood Motor

Step 1: Detach the Electric Power

Detaching the power supply at the hood motor is crucial to ensure your safety. So, please find out the circuit breaker and turn it off correctly. Must remember to check the power supply connection once again.

The reason for repeating this is that there is a higher chance that your life will be at risk if there is a power connection. You can use a electric power tester to make sure about the power supply. For more caution, unplugging the range hood from the power supply source is good.

Step 2: Removing the Fan Cover

Use a screwdriver to detach all sides of the fan cover. Detaching the fan cover will allow you to clean the fan blades and electric motor. Fan covers are generally attached with screws and clips. The manufacturer used screws and clips based on the hood motor type. So, detach the cover as per the range hood design. Take enough time to detach the cover to prevent damaging. Otherwise, other surrounding components may be damaged.

Remove all loose dirt from the fan cover. Then, soak the cover in warm water and a mild detergent solution to remove grease and stubborn dirt. Leave the cover in a safe place for drying.

Step 3: Clean the Fan Blades

Over time, this excess dirt and grime accumulates in the fan blade, which reduces its performance. So, prepare a solution to clean fan blades. Mix some detergent and warm water solution.

Use a cotton cloth and soak it into the solution. Wipe every part of the motor fan carefully. But avoid applying excessive pressure while cleaning the blade, or it may bend. Use a non-abrasive brush to clean the stubborn grease and dirt from the blades.

Hence, Rinse the blades with clean water and wipe them and leave them to dry. Remember to inspect the condition of the blades after drying if they get damaged. A damage may require to replacement of a new blade.

Step 4: Cleaning the Motor

Motor mainly supplies power for air circulation. As a result, the fan blades pull up all dirt and grease inside the duct. So, accumulating dirt inside the motor is normal. Detach the motor from the hood carefully.

Use a soft brush to remove loosened dirt. If there is stubborn dirt, use a damp cloth to wipe that dirt. In the case of motor cleaning, take extra care so that any water can’t reach into the motor. Water ingress will damage parts inside the motor. Moreover, it is impossible to dry inside the motor.

Another great way to clean the hood motor is using a degreaser. You can spray some WD degreaser on the motor surface. But only spray a little. After spraying, leave the motor for a while to loosen the accumulated dirt. After that, wipe gently with a dry soft cloth and all the grime will be clean. If somehow some degreaser entire into the motor, it doesn’t affect the motor performance.

Step 5: Reassembling All Parts

First of all, reattach the range hood motor in the right position. Make sure that the hood is properly placed on the mounting holes. Secure the motor using fasteners and screws. Now, set up the fan blades and cover. Double-check that all parts are connected properly. If everything seems ok, then turn on the power supply.

Step 6: Test the Motor

After completing the whole cleaning process, you would better check the motor performance. So, make sure that the electric power operates the range hood motor. In the meantime, inspect if any weird sounds or vibrations are coming from the motor.

Also, notice if the fan blades are running properly. If you notice anything wrong, your hood may require further maintenance, repair or replacement. If the motor works correctly, let it run for a few minutes and notice overheating or other issues.

How to Clean a Stainless-Steel Hood Vent?

There are three different ways to clean stainless-steel hood vents. Let’s know about these cleaning.

Windex glass cleaner, vinegar and water solution are enough to remove regular fingerprints and cooking dirt. Using glass cleaner is an easy way to clean the range hood and clean glass together.

On the other hand, you can mix 1:1 vinegar and water to clean the steel hood vent. Use a spray bottle to apply vinegar water solution surrounding the hood vent.

Moreover, mild detergent and warm water solution is another effective method to clean stainless steel range hood vents.

What is the Perfect Time for a Kitchen Hood Motor Replacement?

Five signs indicate the replacement time of a range hood. Let’s know these.

  • The hood range doesn’t pull up all smoke and cooking grease efficiently
  • You will notice several dents on the range hood surface
  • When you want to redesign your kitchen, then the hood may need to replace
  • If you want to get advanced features from the range hood, then it is essential to replace a new one
  • When any parts of the range hood are damaged, or your hood gets too noisy

Common Mistakes to Avoid (Navigate the Greasy Minefield)

  • Never use harsh chemicals to preserve their integrity.
  • Don’t scrub vigorously, as it may crack due to excessive force.
  • Don’t abandon them to their fate by neglecting regular cleaning.
  • Avoid rushing their drying process, as moisture can become a breeding ground for unwanted molds and bacteria.
  • Don’t ignore the manufacturer’s instructions; they tell you the safe and effective cleaning process.

Related articles

Conclusion

We hope you understand how to clean the range hood fan motor. Hood motor cleaning is easier, but it needs to maintain some caution. Carefulness is especially important when cleaning the core motor parts. Be aware so that water doesn’t enter through the motor parts. Always use water and a soapy solution for the fan cover and blades. By contrast, use a degreaser to clean the motor.

FAQs

The general recommendation is every 1 to 3 months. But, genuinely, it depends on your cooking habits and frequency.

If you notice some signs such as large holes, fast excessive grease buildup, bent or damaged in your mesh filters. That might be beyond cleaning and redemption.

No, patience is the key here, and they need to be fully dry before reusing them. Otherwise, the damp filters may hinder proper airflow and lead to mold or unpleasant odors.

You May Also Like to Know

Best Reviews

Jump To

Share for your family & Friends

Facebook
Twitter
LinkedIn
Pinterest
Tumblr
Digg

Related Articles

Leave a Reply

Your email address will not be published. Required fields are marked *