Every food and cook lover dreamt of a spotlessly clean kitchen where they can unfold cooking adventures without hitching and coughing due to foggy smoke.
Yes, your cooking partner, ducted range hood, makes your dream come true.
But, in this process, its duct gets dirty with heavy and sticky grease, dirt, and grime. So, it fails to keep your kitchen air as crispy as your cooking freshest ingredients.
Do you feel your range hood duct won’t perform as usual?
If so, it requires a thorough cleaning from top to bottom.
This guide will show you how to clean the range hood duct and make it spotless. Get prepared to unleash the full potential of your healthy and pristine kitchen environment with a clean vent.
What Is Required To Clean Range Hood Duct?
First, remember that cleaning your range hood duct isn’t the same as cleaning its mesh filter or fan motor. Because it is higher in position and difficult to reach due to its narrow and long space.
It requires mid-level DIY skills to corporate the process. More than $150 investment for buying tools and equipment. And 30 minutes to 1.5 hours with good energy to complete the job.
That’s why most homeowners won’t like to do it themselves. Yet, DIY enthusiasts love to do it.
However, in the first part of my discussion, I’ll reveal how to clean your duct like a pro for DIYers.
And in the next part, I’ll show you a side-by-side comparison; is it better to hire professional cleaning services for the job or do it yourself?
So, You can easily get the concept and realize which option is better for you. Without any more words, let’s dive into the main discussion.
How To Clean Range Hood Duct? (A Step-by-Step Battle Plan for Range Hood Duct Brilliance)
You have to follow 6-step guidelines to unleash your duct cleaning superpowers. Which starts from understanding the range hood duct and ends with sealing.
Step 1: Know The Power Of Range Hood Duct
You should understand the range hood duct structure and functionality before cleaning it. Otherwise, there is a high chance of damaging the duct during cleaning.
- The range hood duct is mostly overlooked due to looking just like a pipe. But it tirelessly works every single second during cooking behind the scenes. Yet, it plays the most powerful job in efficient ventilation.
- It silently whisks away smoke, steam, and odors to maintain air quality.
- And it prevents greasy surfaces, and food smells from becoming unwelcome guests at your dining table.
Step 2: Gather the Arsenal
Any cleaning product can’t do the job of cleaning your duct. So, having the right tools and equipment matters a lot. The more appropriate cleaning tools you can arrange, the better cleaning you get for your duct without causing damage. So, they are called duct cleaning mastery.
- Sturdy gloves and goggles to safeguard you and increase your confidence
- A step ladder to reach the duct pipe
- A small camera to investigate the level of grime
- A scrubbing brush with sturdy bristles for the main business
- A trusty screwdriver to remove the filter’s feats
- Non-abrasive cleaning cloths/rugs to care the uncared surfaces
- An all-purpose pressure washer with a hot water nozzle to rinse stubborn grease
- A large bucket to pour the duct rinsing dirty water without making the space messy
Tip:
You should invest in tools and equipment specifically designed to conquer oily residues. Also, consider non-toxic equipment to prioritize both cleanliness and your health.
Where to Find Your Cleaning Arsenal?
You can find duct cleaning gear in your local kitchen supply retailers. These are the nearest treasure troves of cleaning prowess.
Or you can check online marketplaces like Amazon, the digital realm, for the ultimate battle against grease and grime.
However, you should choose the tools wisely arm yourself to restore your range hood duct as shiny as its pristine glory.
Step 3: Prepare the Workstation
Now your main battle against the stubborn grease and grime begins. The space is already messy and equipped with many clutter.
- Clear the space for cleaning glory, removing the clutters. So you get ample room to maneuver your tools and reach the dirt and grime.
- Wear your safety hand gloves and goggles before jumping into the cleaning battle.
- Turn the switch off all the electrical connections to avoid any shocking surprises.
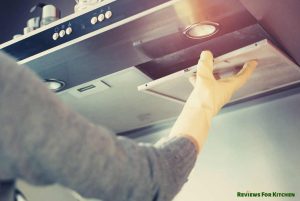
- Climb the ladder and reach the duct adjusting your position.
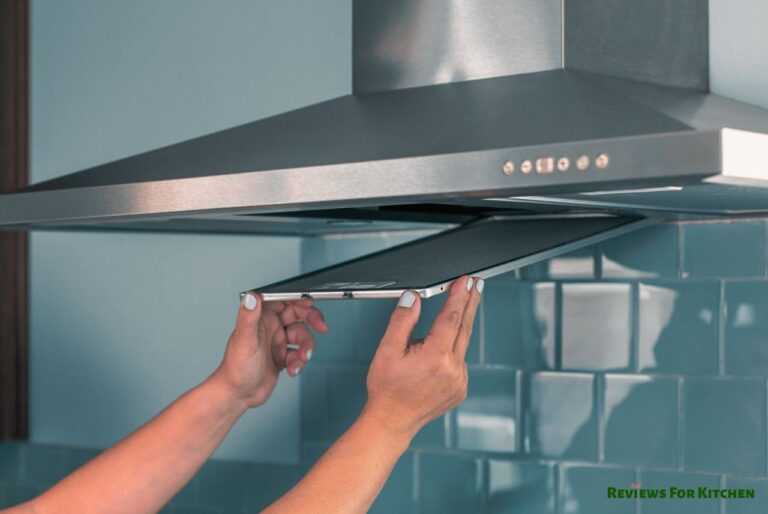
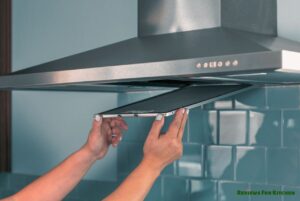
Step 4: Remove the Filters and Grease Traps
You have to remove the filter and grease traps of the hood to liberate its true potential. Otherwise, you can’t efficiently clean the duct.
- Remove the filters and grease traps, rotating the filter clockwise with a screwdriver.
- Ensure enough precision while removing them not to crack.
Step 5: Clean the Range Hood Duct
Now, you are ready with the weapon, and your duct is also prepared for cleaning. Just jump into it.
- Inspect the duct pipe with a camera, clinging it with the nozzle of your pressure washer.
- If it’s too much greasy and sticky, which you can’t tackle with manual scrubbing.
- Then use your scrubbing brush and scrub all the spaces of the duct pipe from one corner to another.
- Ensure each side of the duct pipe gets enough pressure while scrubbing. So the stubborn grease will also soften and lose.
- Then insert the hot pressure washer nozzle into the duct.
- Place the other end of the pressure washer into the bucket.
- Now, turn the machine and rinse the scrubbed dirt, grime, and grease.
- Finally, allow the duct pipe enough time to air dry.
Step 6: Seal the Victory
Once you are sure that the duct is dry and there is nothing risky. You should reinstall the filters and traps, reversing the process of how you removed them.
- Properly place the filters in their space and double-check.
- Then, using the screwdriver, secure it as tightly as possible.
- Reinstall the grease trap.
- Wipe the duct pipe outer layer with rugs.
- Get down the ladder.
How Much Does It Cost For Professional Range Hood Duct Cleaning Service?
The professional service cost will vary in the USA based on your location, duct size, and service provider’s expertise. However, the price will start from $50 and go up to $450. Such as
You have to spend around $200 to $400 in New York City. In contrast, the cost will be about $150 and $300 in Los Angeles, California. And in Chicago, that will be $150 to $350.
Should You Clean Your Range Hood Duct Yourself Or Take Professional Service?
There is no black-and-white answer. As there are lots of important factors to keep in mind. For example
Safety
Handling a greasy duct hood cleaning involves potentially hazardous materials. If you can manage the situation, you can DIY clean. Or professional cleaning service is the best option.
Effectiveness
Its obvious professional cleaning ensures much better efficient cleaning than DIY. If you want a complete, thorough cleaning, go with professional service.
Cost
It’s true; DIY cleaning saves you some bucks upfront as DIY cleaning materials won’t cost as much as the cleaning service charge. But, in the long run, specialized cleaning will benefit you in preventing inadequate cleaning and potential damage.
Convenience
You can just book the service and hand the task to the company. That saves you time, effort, and materials buying hassle. So, a professional cleaning service is more convenient than DIY cleaning.
A Comparison Chart When To Consider Professional Cleaning Service & When To Consider DIY Cleaning
DIY cleaning | Professional Cleaning |
When you have DIY experience in handling duct cleaning procedures. Feel confident of performing the task safely. | When you have no knowledge and expertise in duct cleaning.
|
When your duct pipe is relatively clean with no excessive grease and debris buildup for regular maintenance. | When the duct pipe is too greasy, sticky, and has unpleasant odors, then your tackle. |
When you have most of the required tools and equipment. And you need to buy a few that cost you less than $50. | When you don’t have any of the necessary tools and need to buy them all.
|
When you have time and patience and are comfortable, disassemble and reassemble hood components to complete the job. | When you don’t like to involve with the complex/hard-to-reach ductwork system.
|
FAQs
How do I know if my range hood ducts need cleaning?
There are some signs of requiring the range hood duct cleaning. Such as
- If the duct reduces air flow than usual.
- If it is lingering cooking smells.
- If the excessive grease buildup is visible around the range hood.
- If it has passed a considerable time than the last cleaning.
How often should I clean my range hood ducts?
Generally, most range hood manufacturers recommend cleaning the duct once every 6 to 12 months. However, the exact requirement depends on your cooking frequency, habits, and styles. Or when you observe the symptoms of a dirty range hood duct.
Final Verdict
Hopefully, Our guide to cleaning your range hood duct will help you keep it clean with a DIY approach.
However, if there are other suitable options than DIY cleaning, feel free to consult your local cleaning company and take its service.
The purpose of your range hood duct is to provide you ultimate healthy cooking environment. And you should never compromise with it.
You May Also Like to Know
- Best Ductless Range Hood With Charcoal Filter To Enjoy Fresh Air
- Best Ductless Under Cabinet Range Hood For Convenient Cooking
- Best Ducted Range Hoods For Gas Stoves | Reviews & Buying Guide
- 5 Best Ceiling Mount Range Hood For Your Kitchen
- 5 Best Vented Range Hood For Your Healthy Kitchen Environment
- 5 Best Range Hood For Chinese Cooking To Remove Heavy Grease & Smoke
- 5 Best Under Cabinet Ducted Range Hood for Your Perfect Kitchen
- 5 Best Recirculating Range Hood To Smoke Free Your Kitchen
- How To Install a Range Hood on a Slanted Ceiling
- How To Vent Range A Hood Through A Roof | Easy Guide
- Fixing Range Hood Making Noise When Off | Make It Silence
- How To Install Ductless Range Hood | Under-cabinet, Wall & Island Mount