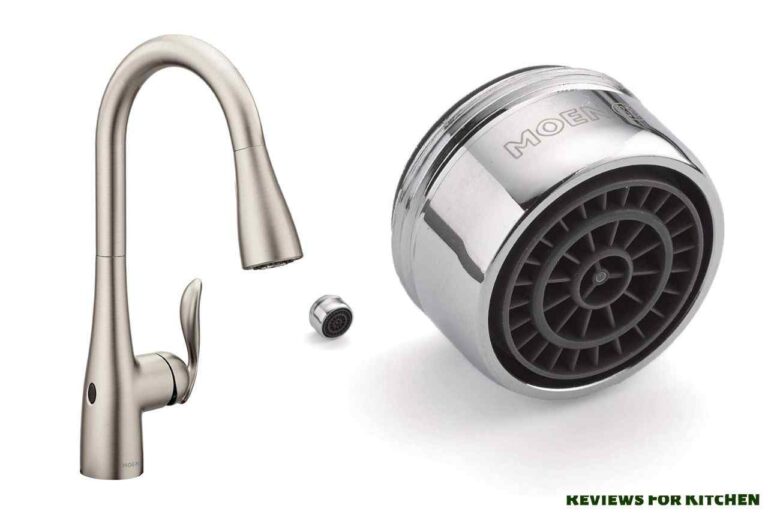
Do you find any trouble with your Moen kitchen faucet? Doesn’t the water flow as usual? The aerator might be the reason behind this discrepancy. When used for a long time, the aerator gets blocked by different particles. So, look into the aerator to fix the case and take steps accordingly. How to remove aerator from Moen kitchen faucet? Fortunately, you have a lot of alternatives while trying to remove the aerator, especially the Moen ones.
For example, you can take pliers to take it out of the position. When the pliers fail, you can apply some oil or heat it with a hairdryer. This makes your effort easy by loosening the tight fittings of the aerator.
While applying an aiding agent or a dryer, you have to be alert to avoid all kinds of harm or dangers. This study tried to find out the best possible techniques to remove Moen aerator. So, don’t miss going through all the following guidelines.
How to Remove Aerator from Moen Kitchen Faucet?
So, depending on the need and condition of the aerator, you need to remove this instrument to stop further deterioration of the faucet and ensure nice water flow.
But this task is not as easy as it sounds. To ease your attempt to clean the aerator of Moen kitchen faucet, this study tried to dig out some innovative ways.
Let’s have a look at them to choose your suitable ones.
Try with Your Hands First
In case you have no instruments to untie the aerator, you can accomplish the task simply with your hands. In fact, you shouldn’t at first look for any tool as the aerator opens up easily with the hands.
First of all, dry your hands as well as the faucet well so that you can deal with the metals comfortably. Later, all that you need to do is turn the aerator following the opposite direction to the way you screwed it first.
But if you are not in a state to use your hands, don’t be sad. You have now a lot of alternatives to separate the aerator. In that case, you need to use any one of the tools listed below.
- Pliers
- Hairdryer
- Oil
- Brush
- Lime-dissolving solution
- Rag
Not that you will use all these materials together. In case one of these doesn’t satisfy your purpose, you will use the other.
You must know that parts like the aerator sometimes may be tricky to deal with.
So, manage all these things as replacements so that you can use any of these and remove the aerator by any means.
If any mineral deposits have clogged the nozzle head, this technique should fix the issue by removing the deposit.
But if this trick isn’t working, you should move ahead with the full replacement.
Related Article: How To Remove A Stuck Faucet Stem?
Take the Pliers to Separate the Aerator
Pliers are the most trusted instruments to remove an aerator. When you fail to unscrew the aerator with your hands, you can separate it with simple pliers easily.
When you catch the aerator with the pliers, be sure that it is touching only the target aerator, so that it cannot make any harm to the faucet. Move it against the clock.
Otherwise, the screw would become tighter. Do this same thing from different positions, which will ease and quicken the task.
Things You Shouldn’t Do
While operating the pliers, you have to be cautious in certain dealings. Otherwise, both the faucet and the aerator would be affected.
Never push the pliers too hard to harm the aerator and the faucet as well. The aerator is not that strong to tolerate any hit, pressure, etc.
When dealing with a new faucet, don’t run the pliers whimsically. You have to be accurate here to protect the aerator from scratches. So, don’t forget to wrap it with a rag and run the pliers carefully.
In case the aerator doesn’t come out after all the effort, don’t overdo the above process. Try another technique to separate it.
Pliers are the most effective device to unscrew the aerator. They must remove it to clean this tool, replace it, or whatever you want to do with it.
In case these pliers even fail to separate the Moen aerator, go for the techniques below to make the task easy.
Apply an Oil to Loosen the Threads
Sometimes the aerator doesn’t tend to come out of its place when it sits there for a long time without being touched or separated.
In that situation, you can spray the required amount of oil that will work to loosen the tight bonding between the aerator and screw.
Now, let the oil stay there for the time being so that it may enter inside and weaken there. Now you can take the pliers to separate the aerator easily.
In between applying oil and using the pliers, you have to dry the aerator so that it doesn’t become slippery and trouble you to handle it and the pliers as well.
Take a Hair Dryer and Do the Task Easily
Is the aerator stubborn enough to come out of its place even after applying the above techniques? Don’t be hopeless; you still have incredible ways of removing it!
Take a hairdryer and heat the aerator neither too much nor too little. This will expand the metal at least a bit and make it easy to take the aerator with little effort.
Clean the Aerator or Replace It
You must be trying to separate the aerator to see whether it is blocked with debris or it has become totally unsuitable to use. If still manageable, take a brush to clean away the debris or mineral deposits.
There might be some kind of grit that the normal brush cannot clean. Then you have to dip the parts into a lime-dissolving solution so that the hard dirt leaves the aerator.
But if you see much rust over the aerator and it seems unmanageable to clean them, don’t think to use it again. Similarly, a much-damaged aerator can also be not used to maintain the proper flow of water. So, you must change this and take a new aerator in these situations for better service.
Final Thought
Moen kitchen faucet can serve your purpose for a long time till the aerator is OK. In case the aerator is damaged, you have to remove and replace it.
This study tried to dig out the best ways of taking out a Moen aerator. So, how to remove aerator from Moen Kitchen Faucet? You can follow several effective techniques to do that.
The most popular step is to use pliers to take it out. Sometimes these instruments alone cannot finish the task.
Then you can apply some amount of oil into the threads to loosen the bonding. With the same goal, you can also use a hairdryer to heat the aerator and weaken the tight metallic fitting.
When the aerator is removed, either clean it with a brush or soak it into a solution to drive away the hard debris. Or take a new one if it seems to be totally unsuitable to assemble and use it again.
So, clean the aerator of a Moen kitchen faucet or if needed remove and change it, making no delay!